When we spend so much of our time online, we’re bound to learn something while clicking and scrolling. Discover something new with Mashable’s series I learned it on the internet.
As a lifelong crafting cynic, I never thought I’d knit anything. But at 10 months into the coronavirus pandemic, I can proudly say I am now a bona fide knitter — up to my elbows in a hobby I love with tons of finished projects I actually enjoy.
For years, when it came to crafting, everything from friendship bracelets to modeling clay eluded me. I’d watch tutorials, pick up supplies at the store, and set about recreating projects the internet told me were “easy” — only to end those endeavors confused and frustrated a few hours later.
As a lifelong crafting cynic, I never thought I’d knit anything.
I’m guessing, dear reader, you know this cycle well. It’s especially annoying for those of us who have tried crafting as a means of stress relief, only to become even more stressed out by those attempts. Why come home from a strenuous day of work or school only to agonize over your DIY dreams-turned-nightmares?
But social distancing has required many of us to trade old stressors for new ones, tapping into a well of patience in the process. And so, 2020 marked the year I was finally able to slow down enough to really enjoy crafting. What happened? I fell passionately in love with the art of knitting — and I think, with time, you can, too.
Knitting vs. crocheting
Yarn-based crafting can be daunting to start. For one thing, you have to begin by making an informed choice about which type of craft is best for you: crocheting or knitting.
Although similar, the two art forms differ in a few key ways. Knitting is often described as the process of “putting loops through loops” (we’ll get to what that means later) using two knitting needles. Crocheting, alternatively, requires making a series of knots using a single crochet hook.
The crafting community has long been divided over which craft is easier, and plenty of crafters do both. So, instead of aimlessly reading opinions on an activity you haven’t even tried yet, ask yourself which finished projects you like and what skills those projects will require. Either way, you’re stitching yarn together to make fabric, so you’ll want to like how that fabric turns out.
[embedded content]
Personally, I chose knitting because I like the look of knitted sweaters. Of course, as a beginner, I’m still months — maybe even years! — away from knitting my first sweater. Still, it’s good to have a goal you’re working toward. You can build your toolbox of knitting or crocheting techniques across multiple projects, and slowly gain the expertise needed to craft your masterpiece.
Looking for inspiration? Pinterest, TikTok, Instagram, and YouTube all have hopping knitting and crocheting communities, full of free video tutorials and “patterns” (that’s crafting lingo for written instructions) you can browse. Remember that yarn crafts don’t limit you to making garments. Enjoy looking at home decor, plushies, and more unusual projects to spark your creativity.
Getting started with knitting
You chose knitting. Amazing! Now, let’s get shopping.
Most knitting tutorials will walk you through the items you’ll need to complete them, but there are some staples you can count on wanting right away. Here’s what to look for:
-
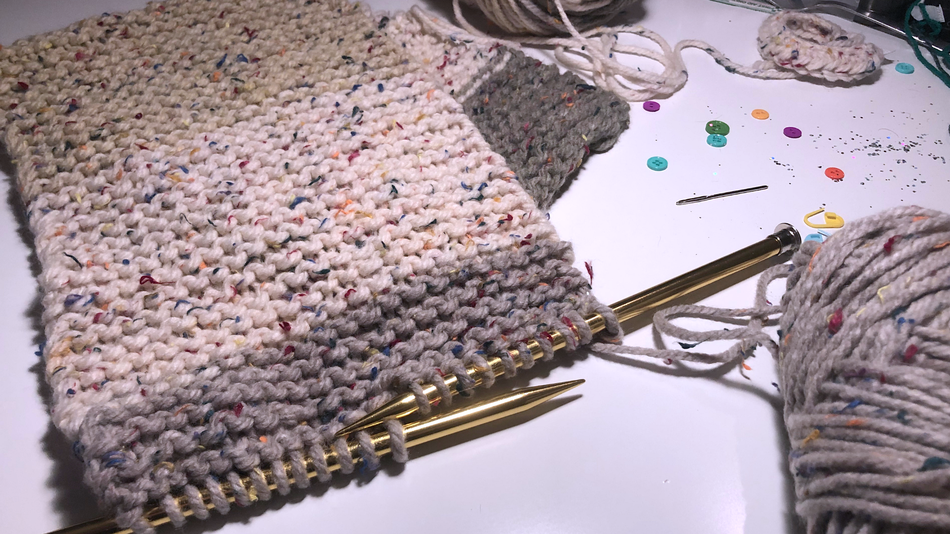
Yarn: Browsing yarn can be both thrilling and overwhelming. For your first yarn purchase, it’s essential you get the correct yarn “weight” (aka, thickness.) Balls of yarn, or if the yarn bundle is in more of a burrito shape, “skeins” of yarn, are sorted by a 0-7 scale standardized by the Craft Yarn Council of America — which, yeah, is a thing!
On that scale, 0 is very thin (labeled as “lace“) and 7 is very thick (“jumbo.”) For your first project, you’ll likely be looking for a yarn of weight 5 or 6 (“bulky” or “super bulky“) since it’ll be easiest to use while learning. Just follow your selected tutorial’s recommendations and make sure to check the label of whatever you’re buying thoroughly. This tutorial from YouTuber Yay for Yarn breaks down yarn weight in great detail if you want to know more.
Oh, and FYI: No brand of yarn is ever “required” to do a knitting project. Yarn manufacturers make free tutorials as a way of advertising their products, but just because you’re following a “John Smith’s House of Whacky Yarn” tutorial doesn’t mean you have to use that specific yarn. Always go with what you can afford, and in pandemic times, acquire safely. It can be nice to peruse yarn in a crafting store like Michael’s or Jo-Ann Fabrics and Crafts, but plenty of crafting supplies can be purchased directly from the manufacturers’ websites or through a digital marketplace like Amazon.
-
Knitting needles: From double-pointed square to circular, there are many different types of knitting needles. When you start, you’ll be looking for the most basic straight, single-point needle. This will look exactly like the knitting needles you’ve seen drawn in cartoons, just a simple stick with a little nub at the end to keep your work from falling off.
Now, needles come in a bunch of sizes — and, like clothing, that sizing is labeled in different ways across the globe. I recommend ignoring the U.S. and UK needle sizing and always going by the metric size, which is the same everywhere and easily found on the label. For your first project, that one you’ll be using bulky or super bulky yarn for, you’ll likely be looking at 10mm or 12mm knitting needles.
Most beginner tutorials will also advise you to stick with wooden or bamboo knitting needles, as opposed to plastic, acrylic, metal, or carbon fiber. That grippy texture makes it less likely that your yarn will accidentally slip off your needle end, which can be really helpful when you’re just starting out.
Tip: If you’re certain you’re going to stick with knitting, buy a set of wooden knitting needles in various sizes. It’s considerably cheaper and means you won’t have to run out to the store if you get inspired by some yarn you have on hand.
-
Darning needle: Without this, you’ll struggle to assemble any project more complex than a basic scarf. Do yourself a favor and grab one of these little guys early on in your knitting career, so it’s there as soon as you want it. They look just like your average sewing needle (the kind you’d use to attach a button) — but are much larger, so they can be used on thick yarn instead of uber-thin thread. They also often have a blunted point.
A word to the wise: Darning needles, like hair ties and earbuds, get lost in the house very easily. Stock up on a few and try to keep them in a tidy container. Organized knitting supplies are the best knitting supplies, said the woman currently sitting on a couch full of runaway darning needles and buttons.
-
Crochet hook (optional): OK, I know you aren’t crocheting, but I’d be remiss to not mention how helpful a crochet hook can be. Grab one for a few bucks and have it on hand, if not for a few knitting tricks then to try crocheting for an afternoon. (8mm should do it.)
To help any beginners daunted by the prospect of another failed attempt after all that crafty capitalism, here are five foolproof knitting tutorials I’ve actually done start to finish.
Complete with brutally honest shortcuts and tips from someone who knows how much you need them, these are listed by increasing difficulty and explain the fundamentals of knitting along the way. You got this!

Image: mashable
Half-jokingly referred to as every knitter’s “obligatory” first project, scarves offer a surprisingly rewarding chance for newbies to practice the knitting basics. There are just two stitches (think of stitches like the building blocks of fabric) in knitting. They’re called knits and purls, and will make up everything you knit from now until the end of time.
For your first attempt at a scarf, you’ll want to select a simple garter stitch scarf tutorial, which uses only knits and will be considerably easier than anything that uses both knits and purls.
My personal gold standard for garter stitch scarf tutorials is the Sheep & Stitch “How to Knit a Scarf for Beginners Step by Step” video, taught by channel host Davina, who does a phenomenal job anticipating the questions you might have. It’s straightforward but appropriately enthusiastic, with lots of suggestions for making your scarf your own — including how to turn your straight scarf into an infinity scarf or combine colors for a fun effect.
Once you know how to get your yarn on the needles (aka, “cast on”), do a knit stitch, and get your yarn off the needles (aka, “cast off”), you’ll be able to create a whole bunch of other rectangular garter stitch projects: coasters, bath mats, blankets, you name it.
Other great garter stitch scarf tutorials include Sewrella’s “How to Knit a Scarf ” and Fiber Flux’s “How to Knit a Scarf for the Absolute Beginner.” It’s important to pick a teaching style that works for you, and if possible, choose a video with time stamps so you can easily jump around when you need a refresher. And don’t be afraid to mess with playback speed. Seeing a knit stitch done slower can really help the concept click for beginners.
What you’ll learn: Cast on, cast off, and knits
How long it’ll take: Between 2 and 7 hours, depending on length and width
What you’ll love: The first time you look down and see that you’re actually making fabric
What you’ll hate: The first time you accidentally “drop” a stitch (Here’s how to fix it!)

Image: mashable
This was the first project I tried after completing a few garter stitch scarves.
LoveCrafts’ “Knitted Fish” tutorial is way easier than it looks — and the result makes for a surprisingly delightful cat toy. All you have to do is knit a small square (no specific dimensions required) and follow along as the (unfortunately silent) instructor shows you how to sew, stuff, and adorn your square so it transforms into a tiny fish.
This is a cute way to get rid of any extra yarn left over from your scarves, or experiment with different needle sizes and yarn weights. As you learned while making your scarf, bigger yarn makes for easier projects, but these fish definitely look better with more, smaller stitches. Completing this will help with your dexterity, and introduce you to new knitting items like your darning needle, plus buttons and toy stuffing. (Tip: If you don’t want to pay for toy stuffing, just fill your fish up with some leftover or even tangled yarn. It looks the same in the end, and it’s just as soft.)
To turn your knitted fish into a cat toy like I did, follow these additional instructions I came up with: (1) Add a little dried catnip from your local pet store in with the stuffing; (2) Sew the button eyes extra firmly, aiming to stitch the button to the knitted fish at least 20 times; and (3) As you would with any homemade toy, supervise your pet for safety reasons.
What you’ll learn: Basic seaming and assembly
How long it’ll take: 90 minutes or less
What you’ll love: Giving your cat a gift straight from the heart, not the pet store
What you’ll hate: Not pulling your string tight enough at the top so there’s an annoying hole (that you tried to fix with your darning needle, but ended up looking kind of lumpy).

Image: mashable
This basic garter stitch scrunchie tutorial from YouTuber Dearly Monica, who does absolutely stunning lacework, is an adorable excuse to get even better with small stitching.
You’ll cast on a whopping 80 stitches with size 4mm knitting needles, using all the techniques you already know in a fun new way. This is also a great chance to try out metal knitting needles, since the slippery texture can actually make manipulating small yarn a bit easier.
With a single ball of light-weight yarn (I used Lion Brand’s Truboo Yarn in mauve), I was able to make four scrunchies for $5.99. And with all those ruffles, you can’t notice any of the mistakes I made learning to work with thinner yarn!
What you’ll learn: Knitting with small needles and light yarn and seaming around an elastic
How long it’ll take: 2 hours per scrunchie
What you’ll love: Popping your scrunchie on your wrist for the first time!
What you’ll hate: Losing count of your stitches while casting on, and having to start over

Image: Mashable
Making a hat was the first project that really made me feel like a knitter. I liked this one so much that I’m actually up to the double digits in completed hats, which is extra funny considering I live in Southern California and have absolutely no use for even one.
Sheep & Stitch’s beginner hat tutorial is ridiculously easy to follow, and teaches you a bunch of new skills you’ll need for making garments going forward. Up until now, every tutorial I’ve mentioned has used the short tail cast on — meaning you put the yarn on the needles with a basic slip knot (the kind they teach in outdoor education) followed by a series of loops, and have only a smidge extra hanging off from there. This hat requires the long tail cast on, which requires more yarn be left hanging off the end so you can create a uniform edge for your hat.
You’ll also learn how to increase rows and decrease rows — that’s how you’ll create the tapering effect from the brim of the hat to the top of the hat — and most essentially, purl stitch. Yep, up until now, you have only had to use one of the two kinds of stitches in knitting. This hat tutorial will explain to you how to do purl stitch, but also links to this even more helpful purl stitch tutorial.
Once you have your basic hat completed, you can dress them up with pompoms or knit stripes using different color yarns — options the tutorial explains as well. What’s even better, this tutorial, taught by our trusty Davina, will show you how to flawlessly seam your hat using the incredibly handy mattress stitch. You can barely see where your flat piece of fabric becomes a certified hat!
What you’ll learn: Long tail cast on, decrease rows, increase rows, mattress stitch, purl stitch
How long it’ll take: Between 2 and 3 hours
What you’ll love: Wearing a thing you made and getting compliments on it
What you’ll hate: Getting too excited and ruining your first hat with really bad seaming
5. Imogen Abbot’s easy, chunky “crop vest top“

Image: mashable
In my experience, it is much easier to find crochet crop top tutorials than knitted crop top tutorials. So thank goodness for the truly lovely Imogen Abbot and her “easy chunky knit crop vest top.”
Using only knits, purls, and a few additional techniques like the easily mastered “slip, slip, purl” — used to decrease rows when you want a left leaning decrease— this crop top can be made quickly in a variety of yarn weights and types. It’s simple to scale up or down for sizing, and will teach you to make simple crochet straps that take less than 5 minutes to master. It’s also a great way to learn a little bit about reading patterns, something you’ll want to do more of now that you’re so good at knitting!
If you like this tutorial, also try the simple crop top from Handmade by Aura. It’s more time-consuming since the stitching is much smaller, but it’s just as cute and easy and requires no crocheting. (If you want to try crocheting an entire project, I recommend this scarf tutorial!)
What you’ll learn: “Slip, slip, purl,” garment assembly, and crochet chain stitch
How long it’ll take: Between 4 and 5 hours
What you’ll love: Adding a little sewed-in tag claiming your work as your own
What you’ll hate: Realizing how many more colors you want and how long that’ll take…
More resources
Congratulations! If you’ve made it this far, you’re well on your way to joining the world’s fabulous, friendly community of knitters. For easy access, here are a bunch of links I have bookmarked for fast reference:
Happy knitting!