Welcome to TNW Basics, a collection of tips, guides, and advice on how to easily get the most out of your gadgets, apps, and other stuff.
As a Windows veteran, I’ve lived under the impression I knew enough about the OS to get as much as I cared out of it. I failed to recognize I was an idiot, and was just plain wrong about the features and flexibility it currently offers.
That’s all in the past: I’d now like to share with you some wisdom that has drastically improved my computing experience — a bunch of handy keyboard shortcuts. These work on Windows 10 and Windows 11, but a couple of them require you to first install PowerToys from Microsoft. Yeah, it’s another couple of steps, but you’ll see why it’s totally worth the hassle. Let’s go.
Copying and pasting multiple snippets with Win + V
Most people copy and paste one bit of text at a time, and they’re losing precious minutes and sanity as a result. Sharing the title of an article along with a link really shouldn’t take that many steps. Thankfully, there’s a way to save multiple snippets of text to your clipboard, and paste them as necessary.
You’ll need to enable Clipboard history to use this feature. The quickest way to do that is click the Start button, type ‘Clipboard’, and click Clipboard settings when it pops up there as a search result.
On the settings page that appears, set the ‘Clipboard history’ toggle to on, and you’re ready to use Win + V.
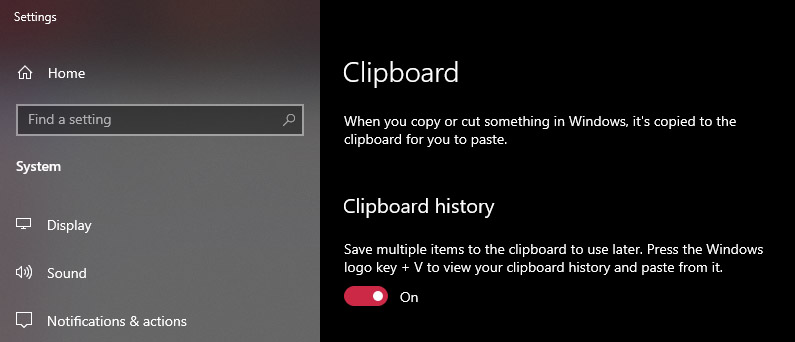

Now, anytime you copy some text, it’ll be stored in your Clipboard along with other snippets, and you can hit Win + V to bring up a list of them to choose and paste wherever you want.
The Clipboard history feature works even when you copy images, screenshots, and even parts of an image in an app like Photoshop — and you can paste those just like you would with text in compatible apps.
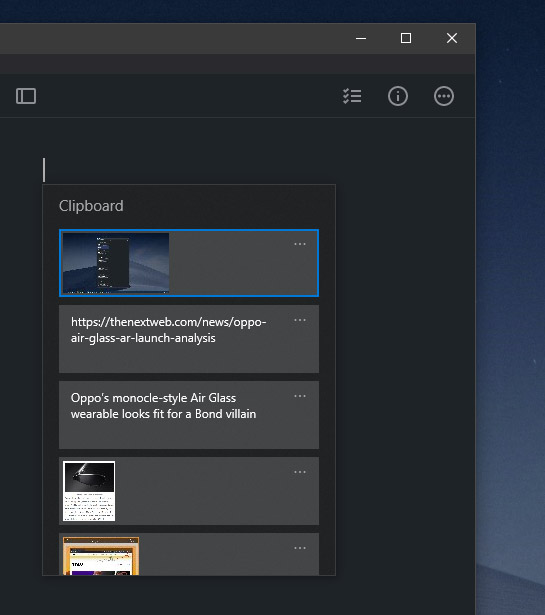

As I described, this comes in particularly handy when I need to share the headline or multiple quotes from an article, along with a link to the piece — and it saves me the hassle of switching between windows and tabs several times.
Mark up and annotate any portion of your screen with Win + Shift + S
I take a lot of screenshots for tutorials, troubleshooting my family’s computer woes, and to share ideas with my team. You probably know about how to use the Print Screen key to grab full-size screenshots. But Win + Shift +S changes the game completely.
It basically invokes the Snipping tool, so you can immediately draw a box on your screen to capture just a part of what’s being displayed. Windows will also display a notification from the taskbar, which you can click to bring up a window for annotating the screenshot with drawing and text tools.
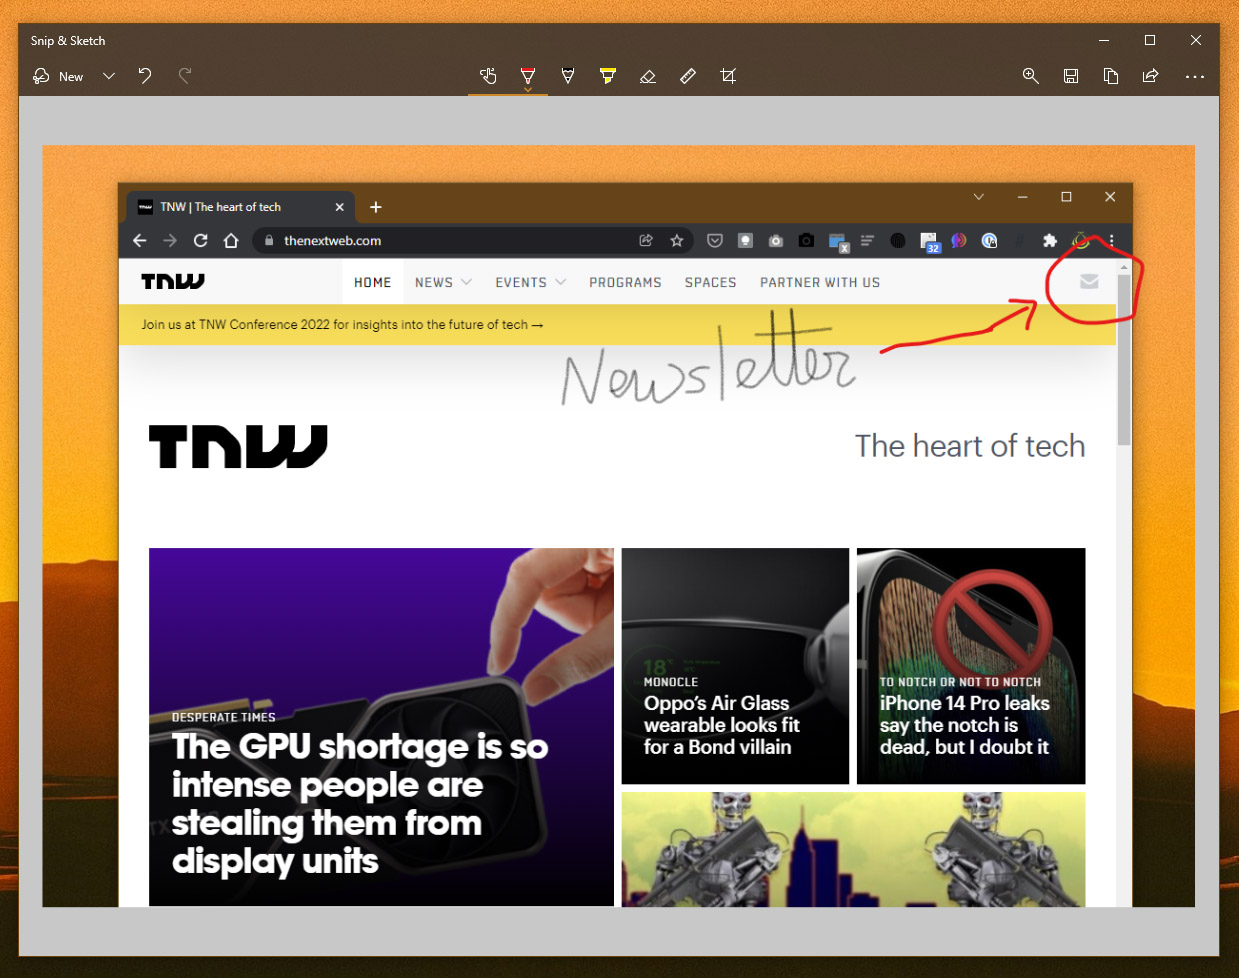

That’s plenty handy, especially when used in conjunction with the Clipboard history feature.
Oh, and I’ve got a bonus tip for you: if you need a full-size screenshot but don’t want to paste it anywhere right away, hit Win + Prnt Scrn to save a screenshot to your ‘Pictures’ > ‘Screenshots’ folder with one stroke.
Switch between work and play using Win + Ctrl + D
All the apps I have open for work often overwhelm and distract me when I want to just relax, record some music, play games, or watch videos. The easiest way to hide that clutter without necessarily closing it all — or worrying about saving my work — is to use Windows’ excellent Virtual Desktops feature.
All you need to do is hit Win + Ctrl + D, and it’s like switching to a fresh space to work on whatever activity you have in mind. All the apps and browser tabs you’d previously opened are still there.
You can create as many virtual desktops as you want, and switch between them using Win + Ctrl + Left / Win + Ctrl + Right. Alternatively, hit Win + Tab to see thumbnails of your desktops at the top of your screen and select the one you want to navigate to.
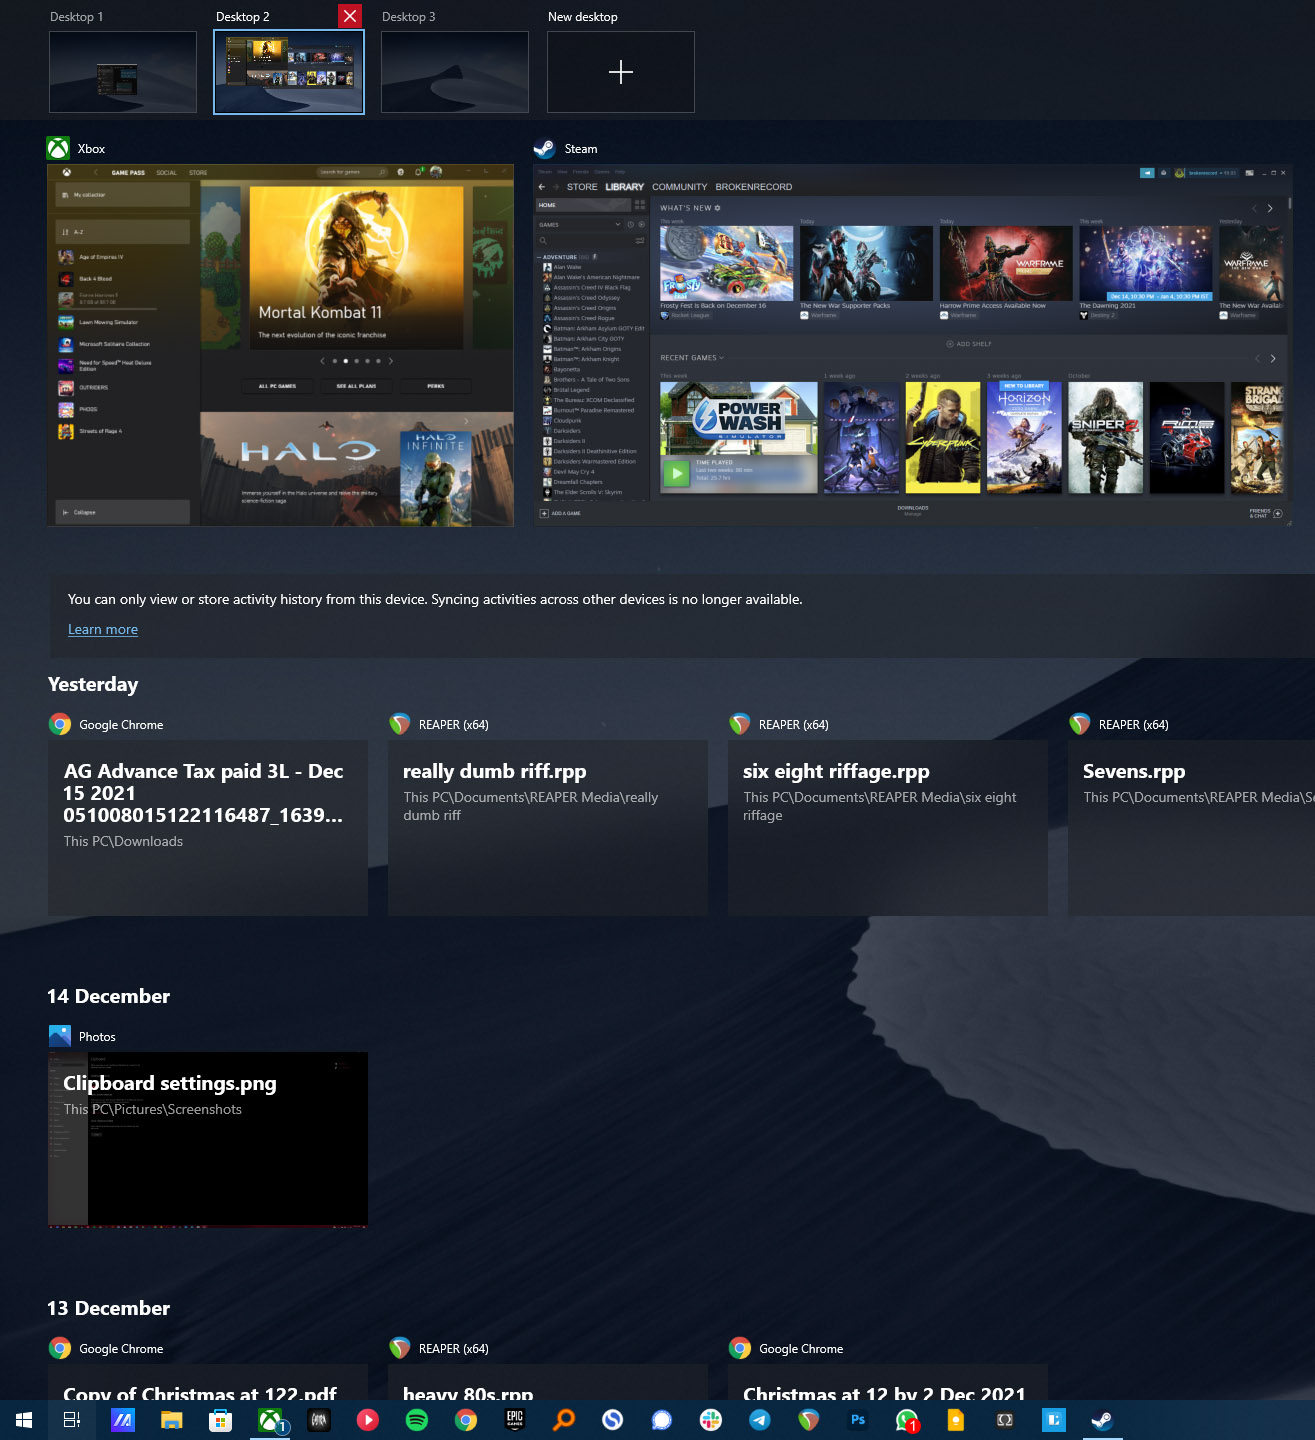

You can also use the Task View button on the taskbar shown above to bring up this overlay. If it isn’t visible, right-click the taskbar, and then click Show Task View button in the context menu that appears.
If you want to close a virtual desktop, hit Win + Tab and click the close button alongside its thumbnail at the top of your screen. Alternatively, if you want to close the current virtual desktop, hit Win + Ctrl + F4.
You should know that virtual desktops only help with organizing your apps; running apps aren’t closed, and they’ll continue to take up memory just as usual. If you’re using a recent or powerful PC, this shouldn’t be a problem.
Launch any app or file from anywhere with Alt + Space
Having used macOS over the years, I’ve always wanted something like its excellent Spotlight feature on Windows to quickly invoke a system-wide search tool and open any app or file on my desktop. Turns out you can do just that, and once you get a taste, you’ll wonder how you managed without it.
You’ll need to first install Microsoft’s PowerToys, which is a free collection of utilities for Windows that really should just be baked into the base OS. Anyway, once you’ve sorted that out, run PowerToys, and then click on PowerToys Run in the left sidebar. Enable this feature by turning on the toggle on the right, and you’re good to go.
Any time you want to launch an app, regardless of whether you’re already running another program, just hit Alt + Space. It’ll bring up a floating search bar, in which you can type the name of the app you’re looking for. Hit Enter to launch the first item in the results displayed below the bar, or click on any of the others that match your query.
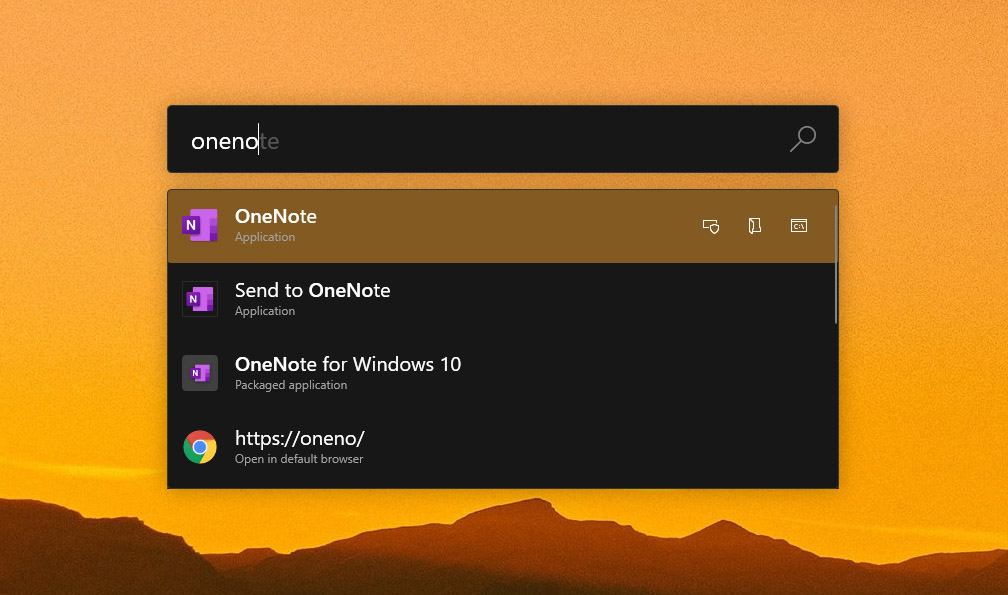

I use this to launch any apps that aren’t already on my taskbar, like Canva for creating images, OneNote for gathering ideas, and Edge (For when I need a browser but don’t want to fiddle with my burden of Chrome tabs).
You can also search for files by name, and it works surprisingly well — you don’t have to type the first letters of the file name to bring it up (though you might need to scroll some search results before you spot the one you want).
That’s a wrap. I hope you give these shortcuts a try, and find them just as useful as I did. If you’ve got a favorite we should let our readers know about, ping me on Twitter or email me, I’d love to hear from you.
