

A good sign that the vinyl revolution is alive and well is my own house — my 13-year-old daughter’s record collection is growing steadily (I never thought I’d see a day where her Christmas and birthday lists are full of vinyl) and my own records are constantly going “missing.”
Most of her friends have record players, too, and while rest assured my own offspring has been well trained on the intricacies of properly dropping the needle, I’ve often cringed watching one or two of her friends fumble around trying to play a record. Well, this is for them, and anyone else who needs a crash course in playing records.
Turntables and their associated polyvinyl discs are sophisticated, delicate analog devices, susceptible to skipping, scratching, and making a variety of horrific sounds if not handled correctly. But if you approach them less like a stomping gorilla and more like a soft-footed cat, you’ll be rewarded with some of the sweetest sounds you’ve ever heard. From taking it out of its sleeve and giving it a clean to lowering that tonearm, here’s how to correctly play a vinyl record.
For some great suggestions on some of the tools you can use for playing vinyl, check out our list of the best turntable accessories, too.
Remove the record from its sleeve(s)
This is not meant to sound condescending, but how you remove a record from its sleeve is kind of important; vinyl must be handled correctly to keep things like oils and debris from the fingers from building up on them, which can damage the record and your needle.
One tip before we start: If you’re playing someone else’s records, make a mental note about how they’re inserted into both the outer plastic dust sleeve (if there is one) and how the inner sleeve (usually paper with the actual disc inside) is inserted inside the cardboard outer jacket. Be sure to put it back the same way.
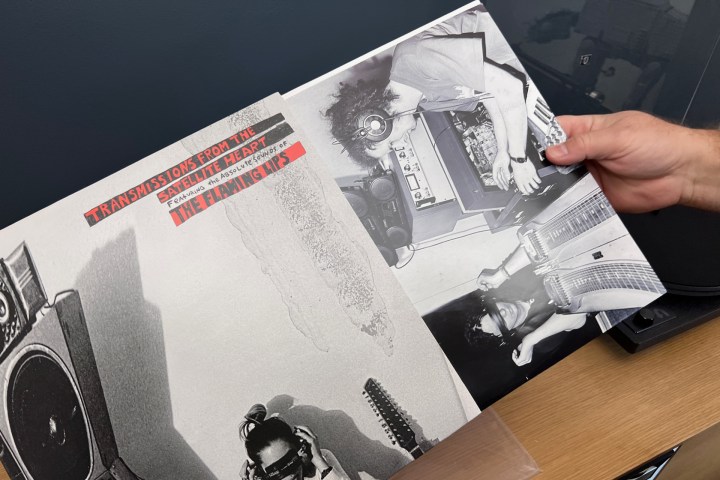
Step 1: If there’s an outer plastic protective cover, remove the record from it.

Step 2: The actual disc should be inside another inner sleeve, inside the outer jacket. These are usually paper, or some collectors use plastic anti-static inner sleeves, too. Take that out.
Step 3: Here’s the important part: With one hand, carefully slide a hand inside the inner sleeve and place a few fingers on the center label of the record.
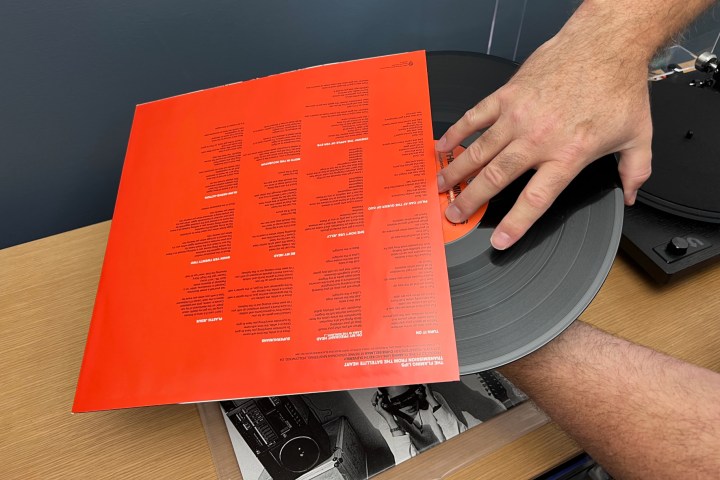
Step 4: With your thumb on the outside edge of the record, slide it while maintaining the cardinal rule of never touching the record’s surface.
Put the record on the platter and spindle
Step 1: Now that you’ve got the record out of the sleeve, let’s make sure you’re handling it properly as you put it on the turntable. This is basically the only way you should ever hold a record. This will apply to when you take it off, too.

Step 2: Holding the record by its outside edges, place it on the platter’s spindle. Try to make sure you line it up as best as possible to avoid the spindle marking up the record’s label. Not a big deal, but if it’s a rare first pressing or sentimental record, you don’t want to scratch the hell out of it.

Clean the record with an anti-static brush
You’re almost ready to spin. The next step is to remove any dust, debris, or pet hair from the surface of the record to protect the stylus and remove any static charge. For this, we use a common anti-static brush that you can buy pretty much anywhere.
For grittier or dirtier records, like used finds or old records, they may require a deeper cleaning. We cover that more thoroughly in another post.
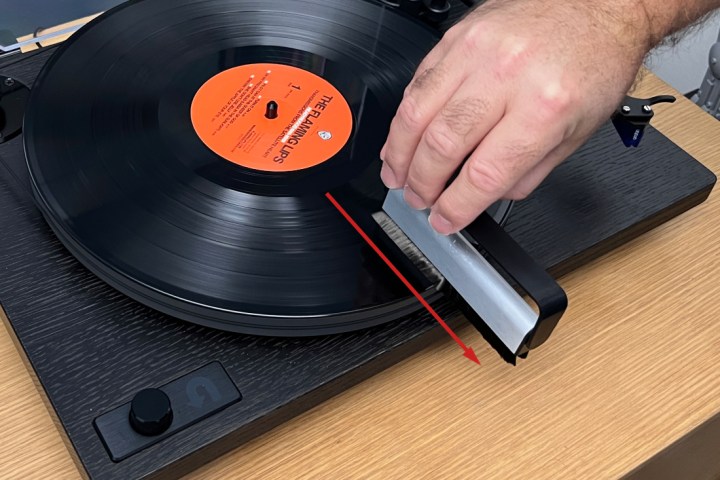
Step 1: With the record on the turntable, start the platter spinning.

Step 2: Holding the body of the brush only (touching the bristles will void any static removal), hold the anti-static brush perpendicular to the record’s grooves and gently contact the bristles with the spinning record at a slight angle.
Step 3: I like to start at around the nine o’clock position and move the brush to the six o’clock position. Then, let the record spin four or five times and let the brush just graze the record’s surface.
Step 4: For the removal, slowly slide the brush toward the outer edge of the record until it’s off.
Step 5: Now you can repeat the process as needed, but be sure to clean the brush each time to loosen anything it’s caught. This can be done with the brush’s plastic outer handle by flipping it back and forth over the bristles. If you want to be more thorough, you can remove the outer handle and swipe the bristles across its edge as well.
Step 6: Optional: some people like to also give their records a brush after they’ve played them before putting them back in their sleeves.
Put the needle on the record
With your record cleaned, you’re ready to spin.
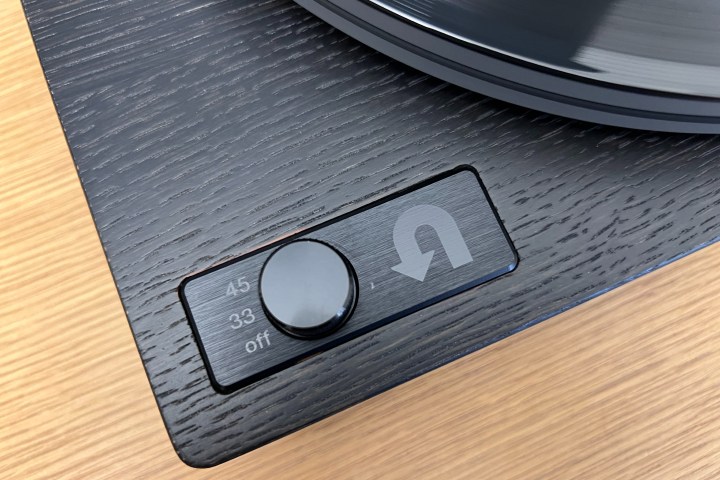
Step 1: Engage the platter to start spinning at the correct speed — either 33 1/3 or 45 RMP. Every turntable is different. Some will have a switch, while others will start when you move the tonearm toward the record. Whichever way yours works, do it.
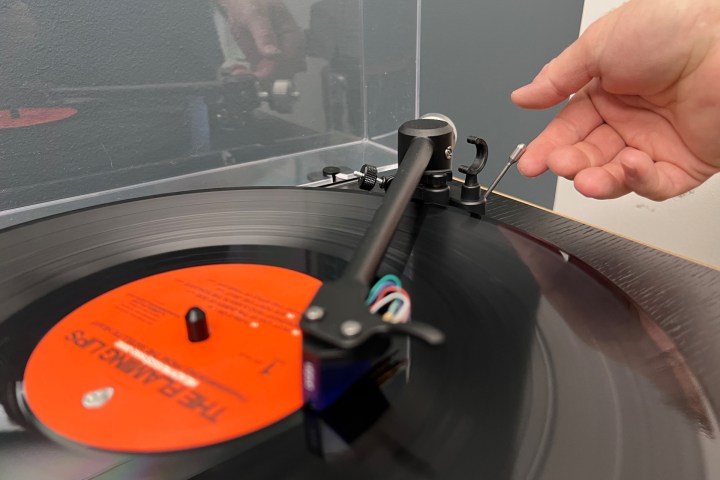
Step 2: Make sure the cue lever is engaged (in the up position) and move the tonearm over so that the needle is sitting directly above the outer edge of the record to play its first song. When you let go, the cue lever will let the needle hover over the record.
Step 3: Lower the cue lever gently, and the stylus will contact the spinning record’s surface and start playing.

Step 4: Some record players don’t have a cue lever, so you’ll have to lower the tonearm and stylus by hand. This is easy as well, but can take some practice. I suggest using your index finger while resting your hand on the platter for stability.
Step 5: Turn up the volume and enjoy!
Stop the record
Some record players have an auto-stop feature, in which the record will stop spinning when it’s done. Whether yours does or not, here’s what to do when you’re ready to stop the music.
Step 1: Simply raise the cue arm to disengage the stylus with the record, whether it’s still spinning or not.
Step 2: Place the tonearm back in its cradle.
Step 3: With the record still spinning, once again use the anti-static brush to give the record one last clean before flipping it to play the other side.
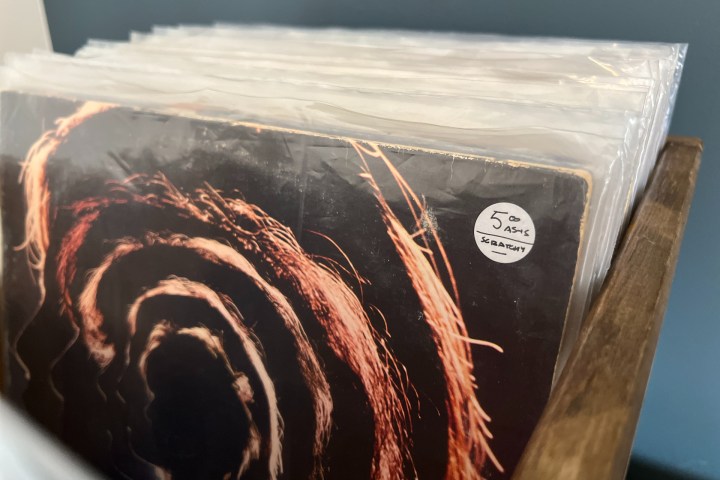
A note on how to put records in their sleeves
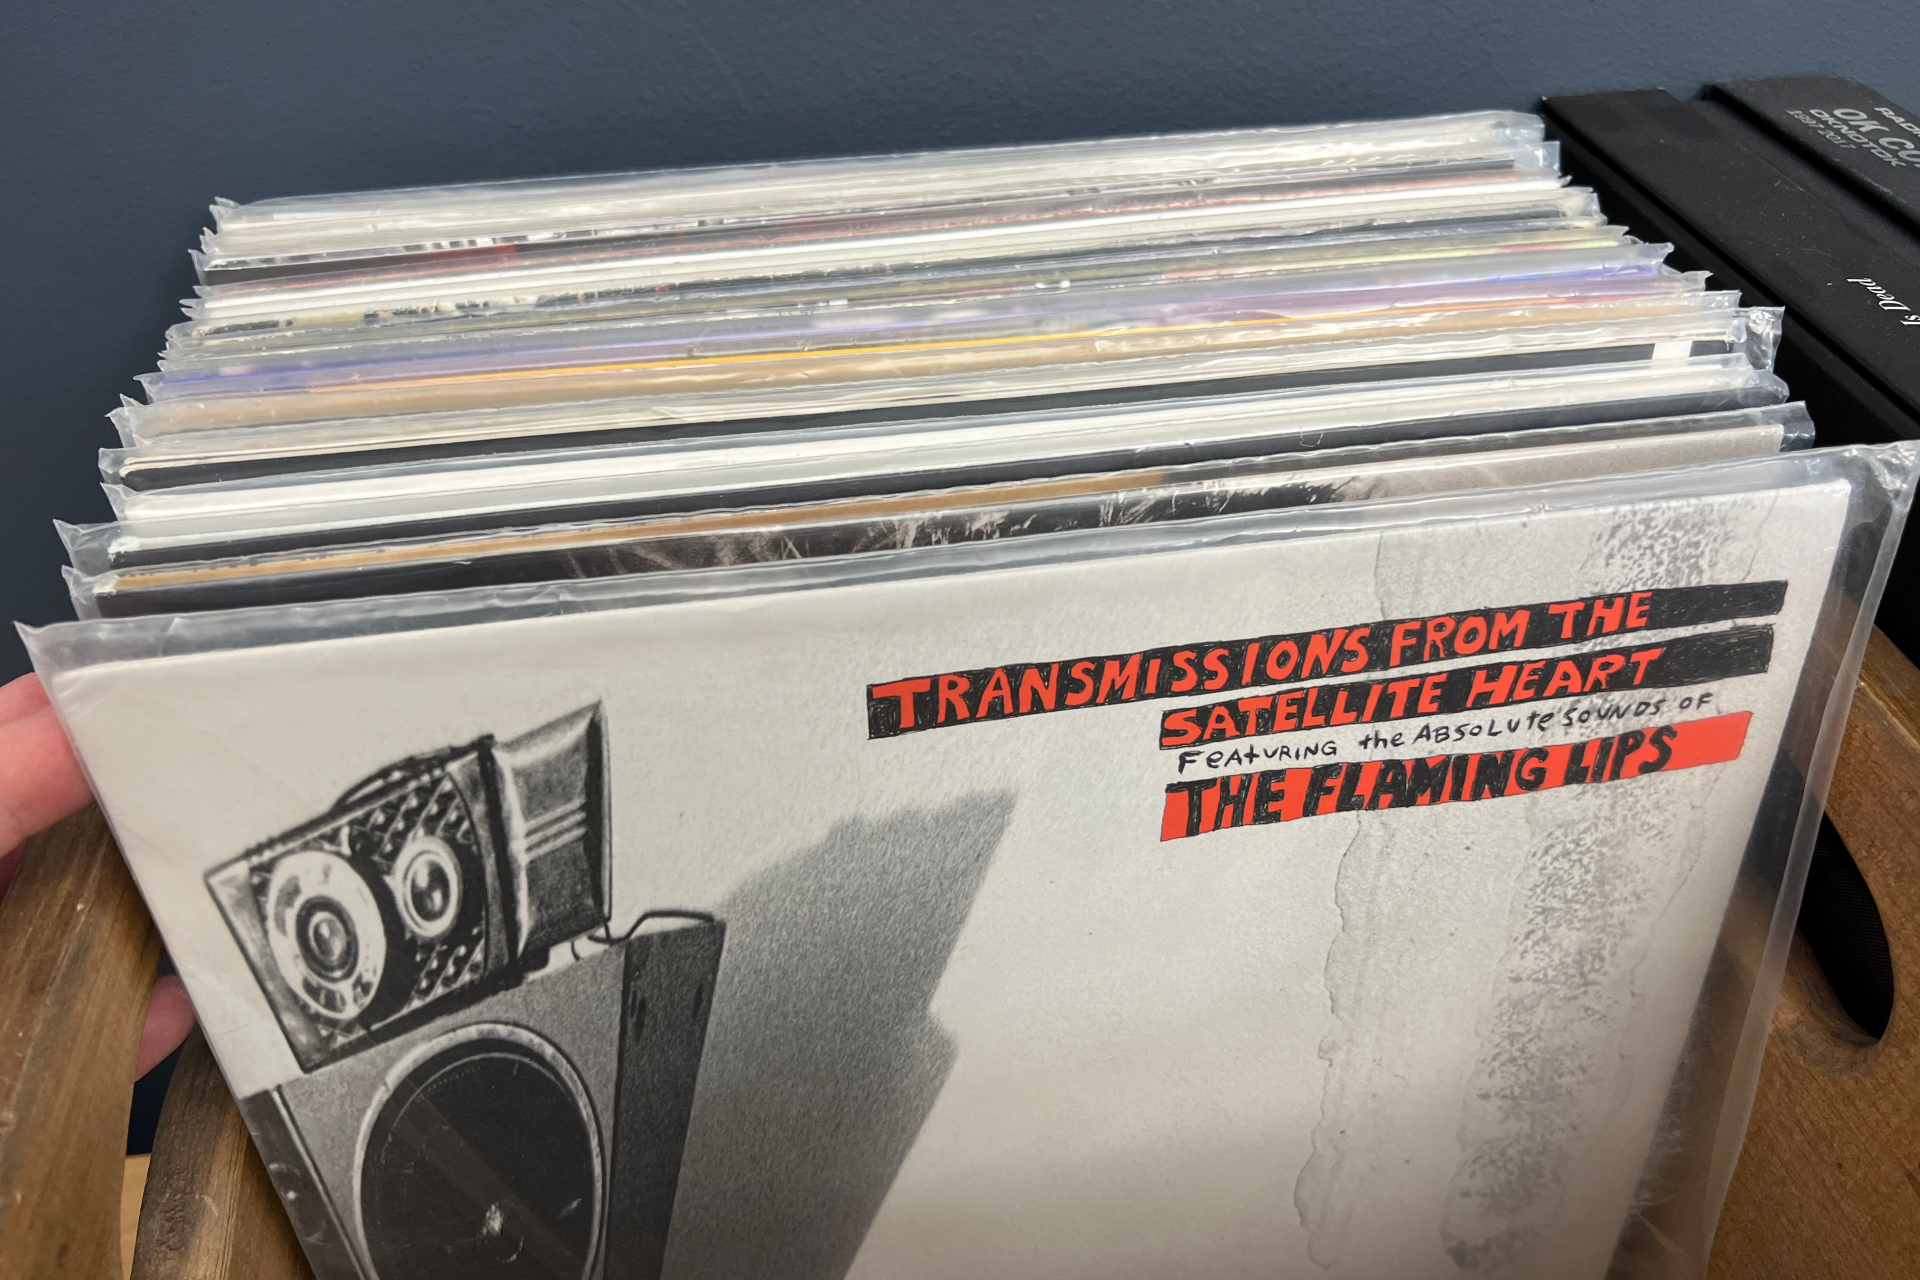
A further note about putting the records back in their sleeves the right way. This depends on how you store your records — like in record store-style bins or crates where the tops of the records are exposed for flipping through or on record shelves with the spines facing outwards. This also depends on whether you store your records in outer protective plastic sleeves or not: Most collectors do, but some do not, and that’s OK, too.
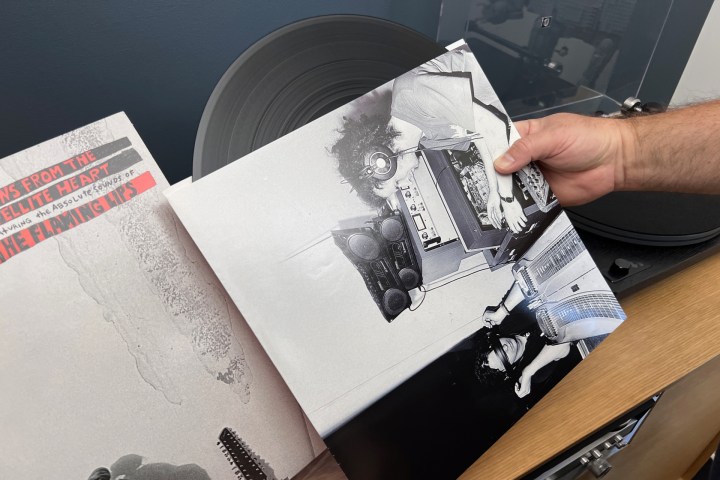
Step 1: With the record in its inner sleeve, slide it back in the jacket with the open side facing upwards and not facing the jacket’s open side. This way, the record can’t fall out.
Step 2: Place the jacket back in the protective plastic sleeve. If you store your records in the record-store style bins, put the plastic sleeves on sideways to the top of the record jacket is not exposed to dirty fingers when flipping.
If you store your records on record shelves, drop them in top-down with the open side up. This ensures that the spines are covered and that when you pull them off the shelves, the plastic sleeve doesn’t get stuck inside or that you don’t just pull the sleeve out on its own, especially on cramped shelves. This is really in the weeds, but it’s the little things that count in record collecting. Enjoy!

Services Marketplace – Listings, Bookings & Reviews