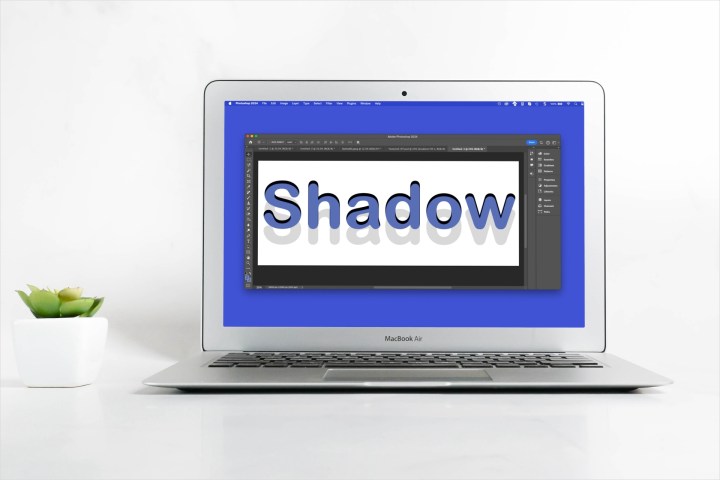
If you’re editing a product photo, creating a realistic drawing, or simply want to add depth to an object, consider applying a shadow effect.
There are two easy ways to add shadow in Adobe Photoshop including a drop shadow on the outside of the object or an inner shadow on the inside of it. Let’s look at how to create both of these effects in just a handful of steps.
Add a drop shadow in Photoshop
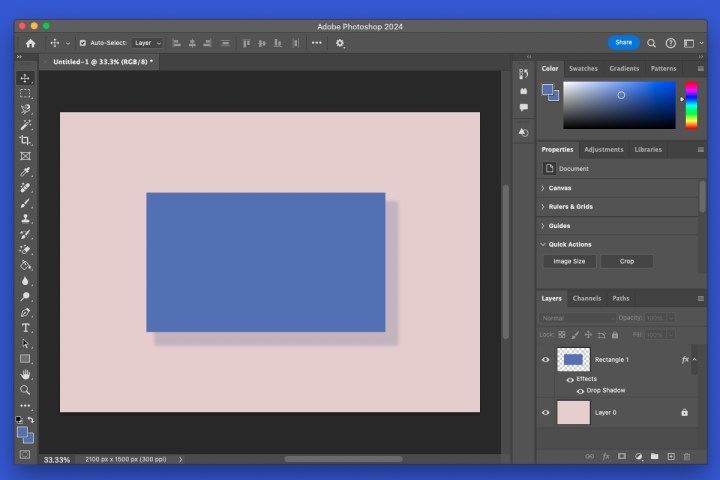
You can give an object, subject, or text the appearance of light from above casting a shadow. This is called a drop shadow, which is common effect that we see in everyday life. The shadow is offset on the outside of the item.
As an example, we’ll add a drop shadow to a simple shape, but you can use it for subjects in photos or text in images.
Step 1: Select the object and unlock its layer in the Layers panel on the right.
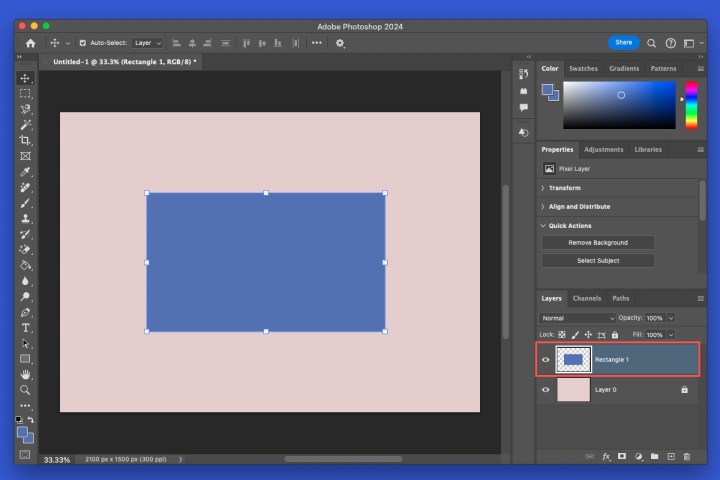
Step 2: Open the Add layer style menu (FX icon) at the bottom of the panel and choose Drop Shadow.
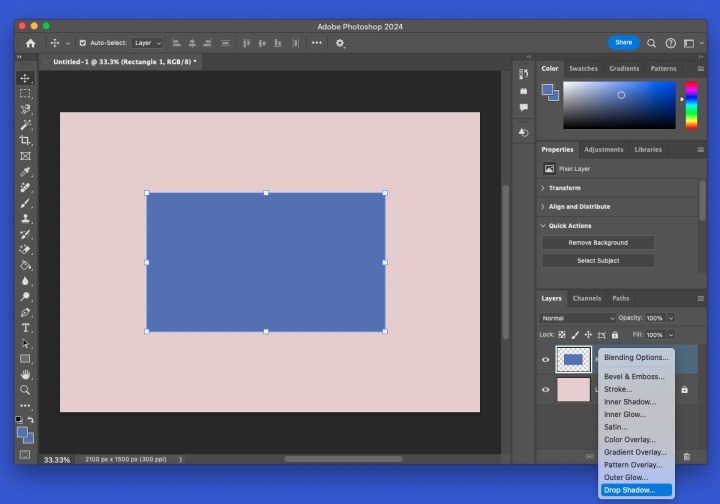
Step 3: In the pop-up, choose the settings for the drop shadow in the Structure section. As you make your adjustments, you can see a preview on the right as well as on your image.
- Blend Mode: Pick the blending style you want to use and select the shadow color to the right. You can preview different styles, but Multiply and Linear Burn work well.
- Opacity: Opacity of the shadow, which determines how prominently it appears.
- Angle: Angle at which the shadow is cast by turning the dial or entering a value.
- Distance: Distance for the castoff of the shadow, which is how far away it detaches.
- Spread: How gradually the shadow fades off.
- Size: Size of the shadow.
In the Quality section, optionally adjust the Contour and Noise per your preference. You’d normally leave these at the defaults but can experiment with different settings.

Step 4: Select OK when you finish to apply drop shadow.
If you want to edit the drop shadow after you apply it, double-click Drop Shadow in the object’s layer to reopen the pop-up box and make your changes.
Add an inner shadow in Photoshop
Opposite of a drop shadow in Photoshop, you can add an inner shadow. This type of effect has the shadow on the inside of the object or text rather than the outside as with a drop shadow. It can create an interesting and unique appearance.
Step 1: Select the object and unlock its layer in the Layers panel on the right.
Step 2: Open the Add layer style menu at the bottom of the panel and choose Inner Shadow.
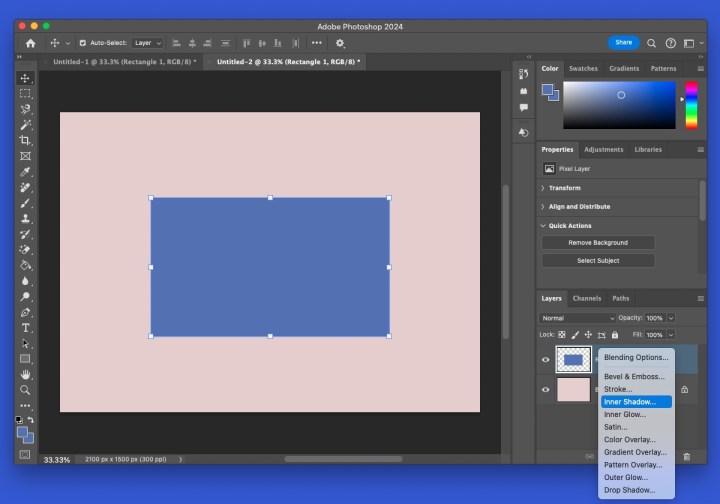
Step 3: In the pop-up, choose the settings for the inner shadow in the Structure and Quality sections. These are the same as those above for the drop shadow but instead of Spread, the setting is called Choke.
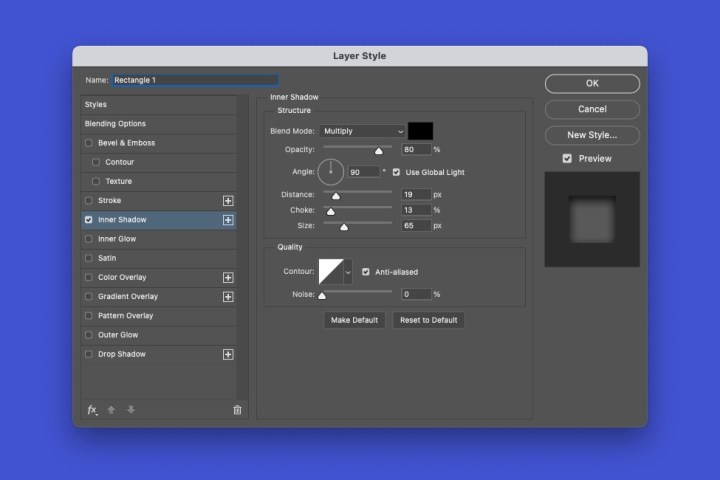
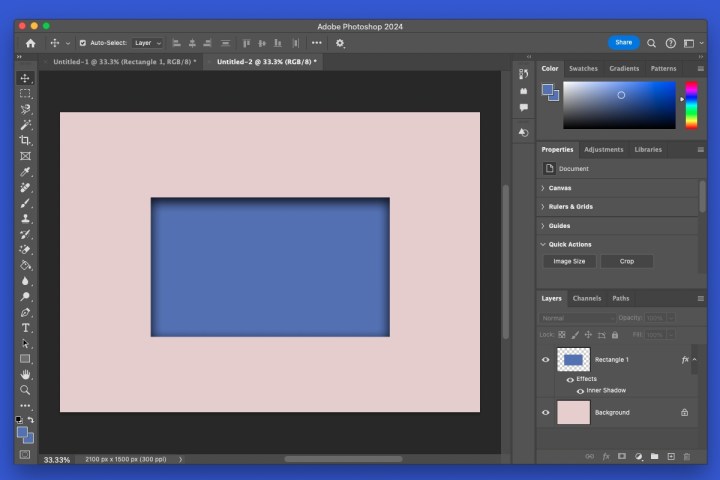
Step 4: Select OK when you finish, and you’ll have your inner shadow.
To edit the inner shadow after you apply it, double-click Inner Shadow in the object’s layer to reopen the pop-up box.
FAQs
How do you add highlights and shadows in Photoshop?
Different than drop and inner shadows in Photoshop, you can adjust the lightest and darkest elements in an image with the highlights and shadows tool. Open Image in the menu, move to Adjustments, and select Shadows/Highlights. Use the pop-up window to edit the amount, tone, and radius for the shadows and highlights.
Why add shadow to an image?
Shadows add depth to an object making it look more realistic. This can be important when marketing products, for example. Even with text, you can add shadow to make it appear as if it’s raised off the page or sunken into it.
How to you delete a shadow layer in Photoshop?
If after you add a shadow effect, you decide to remove it, you can do so in just a few steps. Select the Effects layer containing the shadow, right-click, and choose Clear Layer Style.
Services Marketplace – Listings, Bookings & Reviews
