Whether you’re cleaning your Apple Watch band or upgrading to a new one, removing the band from the watch is a simple process that should only take a few seconds.
Regardless of the series of Apple Watch you have, the process for removing the band is the same. Note, according to Apple, that “bands for 38mm and 40mm cases are compatible with each other, and bands for 42mm and 44mm cases are compatible with each other.” The sizes for your Apple Watch case and bands can be found on the back of your bands, but be warned: The text is really small.
Here are the steps to remove or change the band from your Apple Watch.
1. Remove the watch from your wrist
In order to remove the band, you’ll need to access the back of the watch, so take a deep breath and remove your device from your wrist.
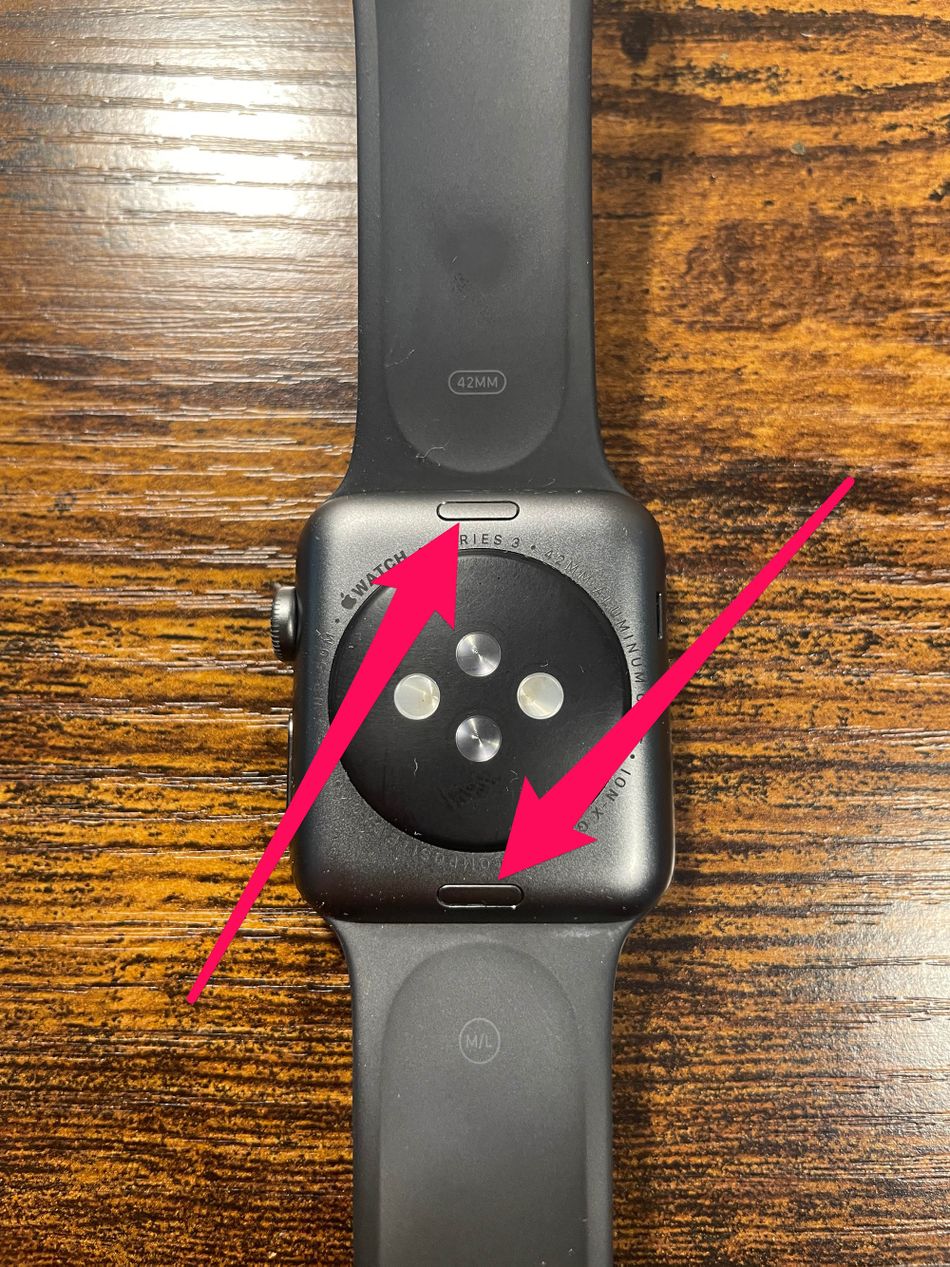
2. Push down on the lock release button and hold

Push down on the release button to remove the band from your Apple Watch.
Image: Mashable
Both the top and bottom bands click into your Apple Watch using the same type of lock located on either side of the Watch. Push down on this lock button and hold it…
3. Slide the band out in either direction

While you push down on the release button, slide the band out.
Image: MASHABLE
While you are holding the lock button down, slide the band in either direction. It should slide pretty easily, but occasionally the band does not release immediately. If this happens, Apple suggests pressing down on the lock button again and ensure that you’re holding it down firmly.
4. Replace your band by sliding the band back through the channel

Replace your band by sliding it back through the channel on your Apple Watch
Image: MASHABLE
Once the band is released, you can now clean it or replace it with another band. The text on the band — which denotes the size of the case on the top band and the size of the band on the bottom band — should face toward you as you slide it back into the watch. You should hear a click and feel the band lock into place.

The top text denotes the size of the Watch case and the bottom text shows the size of the band.
Image: Mashable
Whenever I remove my band from my Apple Watch, I like to clean my watch with a little bit of rubbing alcohol or mild soap and a cotton swab.
