Nothing brings me more joy than double tapping one of my AirPods to skip a song while I’m on a walk. It’s the simple things in life.
That’s the default tap setting on AirPods, but perhaps you’ve wanted to tap to activate Siri, or tap to actually go back one song rather than skip forward. Well, you can customize those AirPods settings, and we have detailed steps on how to do it.

Image: screenshot: Apple
There are different settings you can mess with depending on what model of AirPods you have. For the OG AirPods wearers:
1. Open your AirPods case nearby your phone, or put your AirPods in your ears.
2. Head to your Settings, then tap Bluetooth, and find your AirPods among the available devices.
3. Click on the little “i” icon next to your AirPods, and you should see all of the settings you are able to customize.
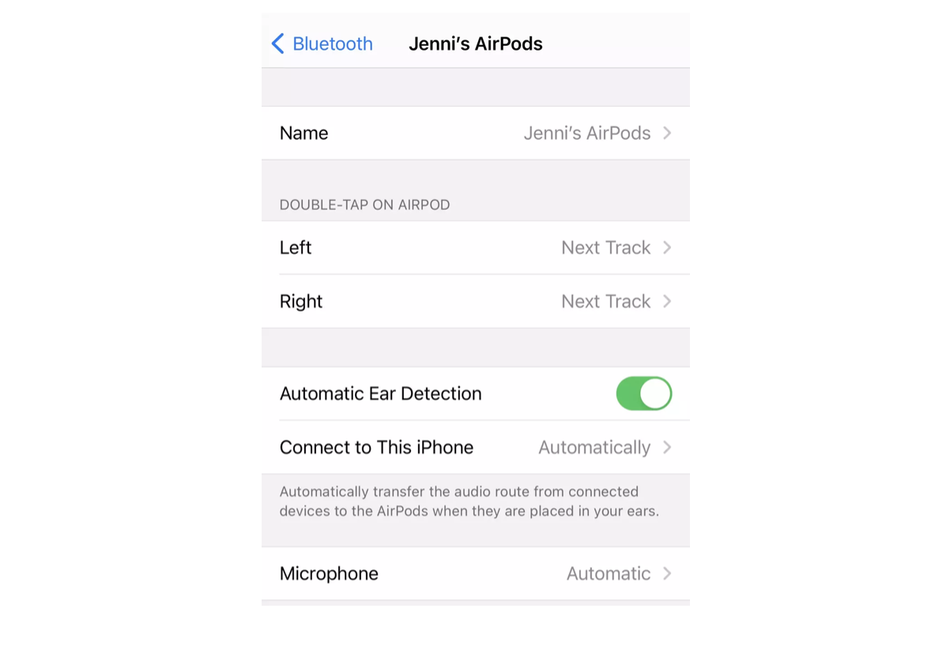
Available customizations:
-
Name: Tap on “Name” and type in whatever you want to call your AirPods.
-
Double-tap settings: Tap on “Left” or “Right” to set the action for double tapping either AirPod. Options include activating Siri, play/pause music, next track, previous track, or just turning double-tap off.
-
Automatic Ear Detection: Toggle this setting on or off to allow your AirPods to detect when they’re in your ears. If on, they will automatically play anything on your phone when you put your AirPods in, and pause anything playing when you take out one or both pods.
-
Microphone: Tap on “Microphone” to choose which AirPod collects sound for phone calls via the microphone. If you leave it on “Automatic,” the microphone will transfer if you happen to only have one AirPod on.
How to customize your AirPods Pro settings
AirPods Pro settings are very similar to the first- or second-generation AirPods, but it swaps the tapping customizations for Force Sensor customizations. To access them:
1. Open your AirPods Pro case nearby your phone, or put your AirPods Pro in your ears.
2. Head to your Settings, then tap Bluetooth and find your AirPods Pro among the available devices.
3. Click on the little “i” icon next to your AirPods Pro, and you should see all of the settings you are able to customize.
The available customization options are the same as above, and use the same processes. But instead of tapping customizations, you get:
How to customize your AirPods Max settings
Changing the name of your AirPods Max uses the same process as above, but these babies are the new kid in town, so they’ve got different customization options. The differences stem from the entirely different form factor, digital crown, and buttons.
1. Take your AirPods Max out of the Smart Case while near your phone.
2. Head to your Settings, then tap Bluetooth and find your AirPods Max among the available devices.
3. Click on the little “i” icon next to your AirPods Max, and you should see all of the settings you are able to customize.
Available customizations:
-
Noise Control Button: Make sure you have iOS 14.3 or later, and you can choose which sound mode you want to switch to when you click the button here.
-
Automatic Head Detection: You can toggle this on or off similar to Ear Detection for the former AirPods models, and your AirPods Max will recognize when you’re wearing them and can play your music appropriately.
-
Rotation Direction: Tap on “Digital Crown,” and you can choose which direction you’d like to turn your digital crown to increase or decrease volume.
For all models of AirPods, you can also tap “Forget This Device” at the very bottom to completely erase its pairing data from your phone. And if you happen to accidentally tap this, it’s not the end of the world. You can easily re-pair them the same way you would a new pair of AirPods. Maybe it’ll even make you feel like you just got a brand new pair!