Two-factor authentication should be your default setting for all the online spaces where you dwell. And for PlayStation owners specifically, setting that up is as easy as it could be.
Sony’s two-step verification (2SV), as the company calls it, can be switched on from your console, web browser, or the PS App. It’s a similar process no matter where you do it, but let’s walk through all three just so everyone’s clear.
Setting up PlayStation 2SV on your console (PS4 or PS5)
Whether you’re on a PlayStation 4 or PlayStation 5, open up the main Settings menu and then select “Users and Accounts.” That should open a sub-menu with additional options; you’re looking for the one that says “Account” (it should be the top option).
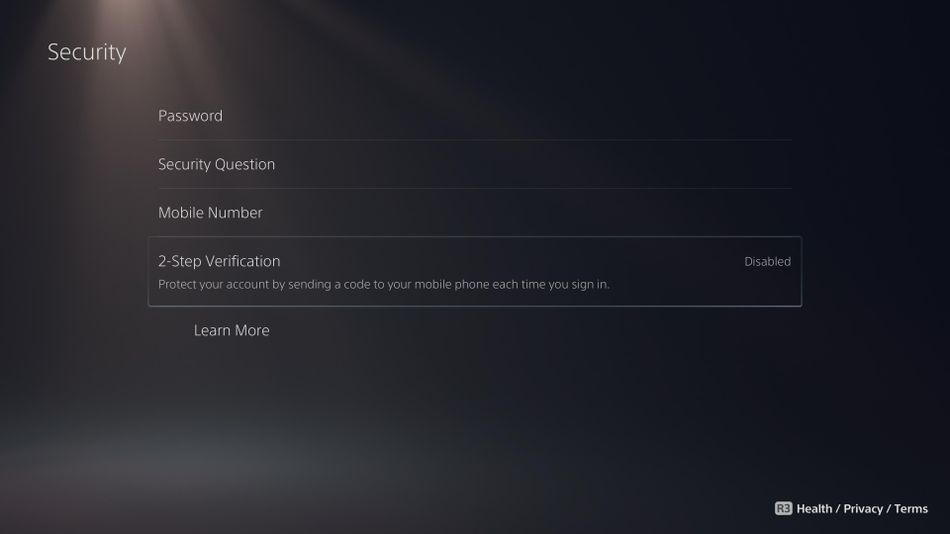
From there — you’ve almost made it, I promise — choose “Security” to open up one more sub-menu. This is what you should see. (2SV is deactivated here so you know what to look for.)

Image: screenshot: Sony
The bottom option, “2-Step Verification” is your final destination. You can read up on how 2SV works by selecting the “Learn More” option just below the 2SV menu setting. But you can get the exact same information from right here on Sony’s website — selecting Learn More just opens that page in your console’s web browser.
Anyway. We’re assuming you want 2SV turned on, so highlight 2-Step Verification and hit the X button to open up one more page, where you’ll choose which form your want your verification process to take.

Image: screenshot: sony
Sony offers two options: Text messaging or an authenticator app. If you choose the first option, you’ll be asked to verify your contact phone number. Sony will then send a verification code via text that you’ll have to enter in. Do that and you’re done, 2-Step Verification will be turned on.
The authenticator app is a similar process. If you’ve never used one of these apps before, they’re all work in pretty much the same way and all the ones I know are either free or include a free option. Our friends at PC Mag have a round-up of the best authenticator apps out there. I personally prefer the simple setup and speedy performance of Google Authenticator.
Whichever app you settle on, you’ll need to link it up with your PlayStation account. Select “Authenticator App” from the PlayStation settings menu shown above and you’ll be presented with a QR code alongside a lengthy alphanumeric code. You can manually enter that code on the app side, but most authenticator apps I know of (including the Google option mentioned above) let you simply scan a QR code.
Whichever route you take to get your PlayStation account set up in the authenticator app, your final step will be checking the app and punching in the numerical code on the console side. And that’s it, you’re done.
Setting up PlayStation 2SV on the web or PS App
The setup process for PlayStation 2SV in your browser is fundamentally the same as it is on console, but the steps you take to get there are slightly different.
First, sign into your account on PlayStation.com. Once the main homepage reloads, click your little user icon near the top-right corner of the page, just to the right of the “My PlayStation” dropdown menu. I’ve positioned my cursor over the spot you’re looking for in the screenshot below, though you’ll see a different icon there depending on what you picked for your account thumbnail.

Image: screenshot: sony
Clicking the icon will bring up a dropdown menu with a number of options; the top one, “Account Settings,” is what you want.
Click that and you’ll be zipped over to a completely different website where Sony stores user account information. Click “Security” in the menu on the left side of the screen, then click “Continue” if you get a pop-up that reads: “You will go to another page.”
The new page is the browser version of the console’s “Security” menu pictured above. (I’m not sharing a screenshot here because it shows more of your personal info, such as contact email address, on the browser menu.) It may look different, but the process remains the same.
Select the “Edit” button for the bottom menu option, which should be “2-Step Verification.” Then choose either “Text Message” or “Authenticator App” and follow the instructions (which are identical to the ones described above) to complete the setup process.
You can also do all of this using the PS App. It’s just a little more convoluted a process to achieve the same result, so you’re best off sticking with console or browser setup. But for those who simply must turn on 2SV in the PS App, for whatever reason, here’s a quick rundown of what to do.
Open your app and tap the gear icon near the top of the page. Then, in the menu that opens, scroll down until you see the “PlayStation Network” subheading. Tap the “Account Information” option just below that and a new window will open. (You may be asked to enter your password again here.)
From that new menu, tap the “hamburger” button and then choose “Security” from the menu that pops up. If you’ve been reading along to this point then you’re in familiar territory now. Just select the Edit button on the “2-Step Verification” option at the bottom of the menu and follow the setup process for your preferred authentication method.
That’s it! You now have many more options for setting up 2SV on your PlayStation device than most people will ever need. Your console is the easiest place to do it, but it’s still simple enough to do in your browser (and slightly less simple in the PS App).
Happy gaming!