Whether you’re planning a special surprise for someone, want to get an embarrassing photo out of your life (but not too far), or just want to keep certain images hidden, there are plenty of reasons to hide a photo on your iPhone’s camera roll. Thankfully, iOS 16 supports a quick and easy way to separate out specific photos into a locked Hidden folder.
While you could just delete these photos from your iPhone, having the ability to quickly hide photos on your phone can be invaluable, especially if your phone often ends up in the hands of children or friends. Here, we’ll show you how you can hide your photos on your iPhone and iPad. Later on, we’ll show you how to remove them from your Hidden folder too.
But first, here’s how to hide pictures on your iPhone.
See more
How to hide your photos on your iPhone
The quickest way to hide photos on your iPhone, iPad, or iPod Touch is to use the native Photos app. It removes the selected images from your main library and from appearing in search results.
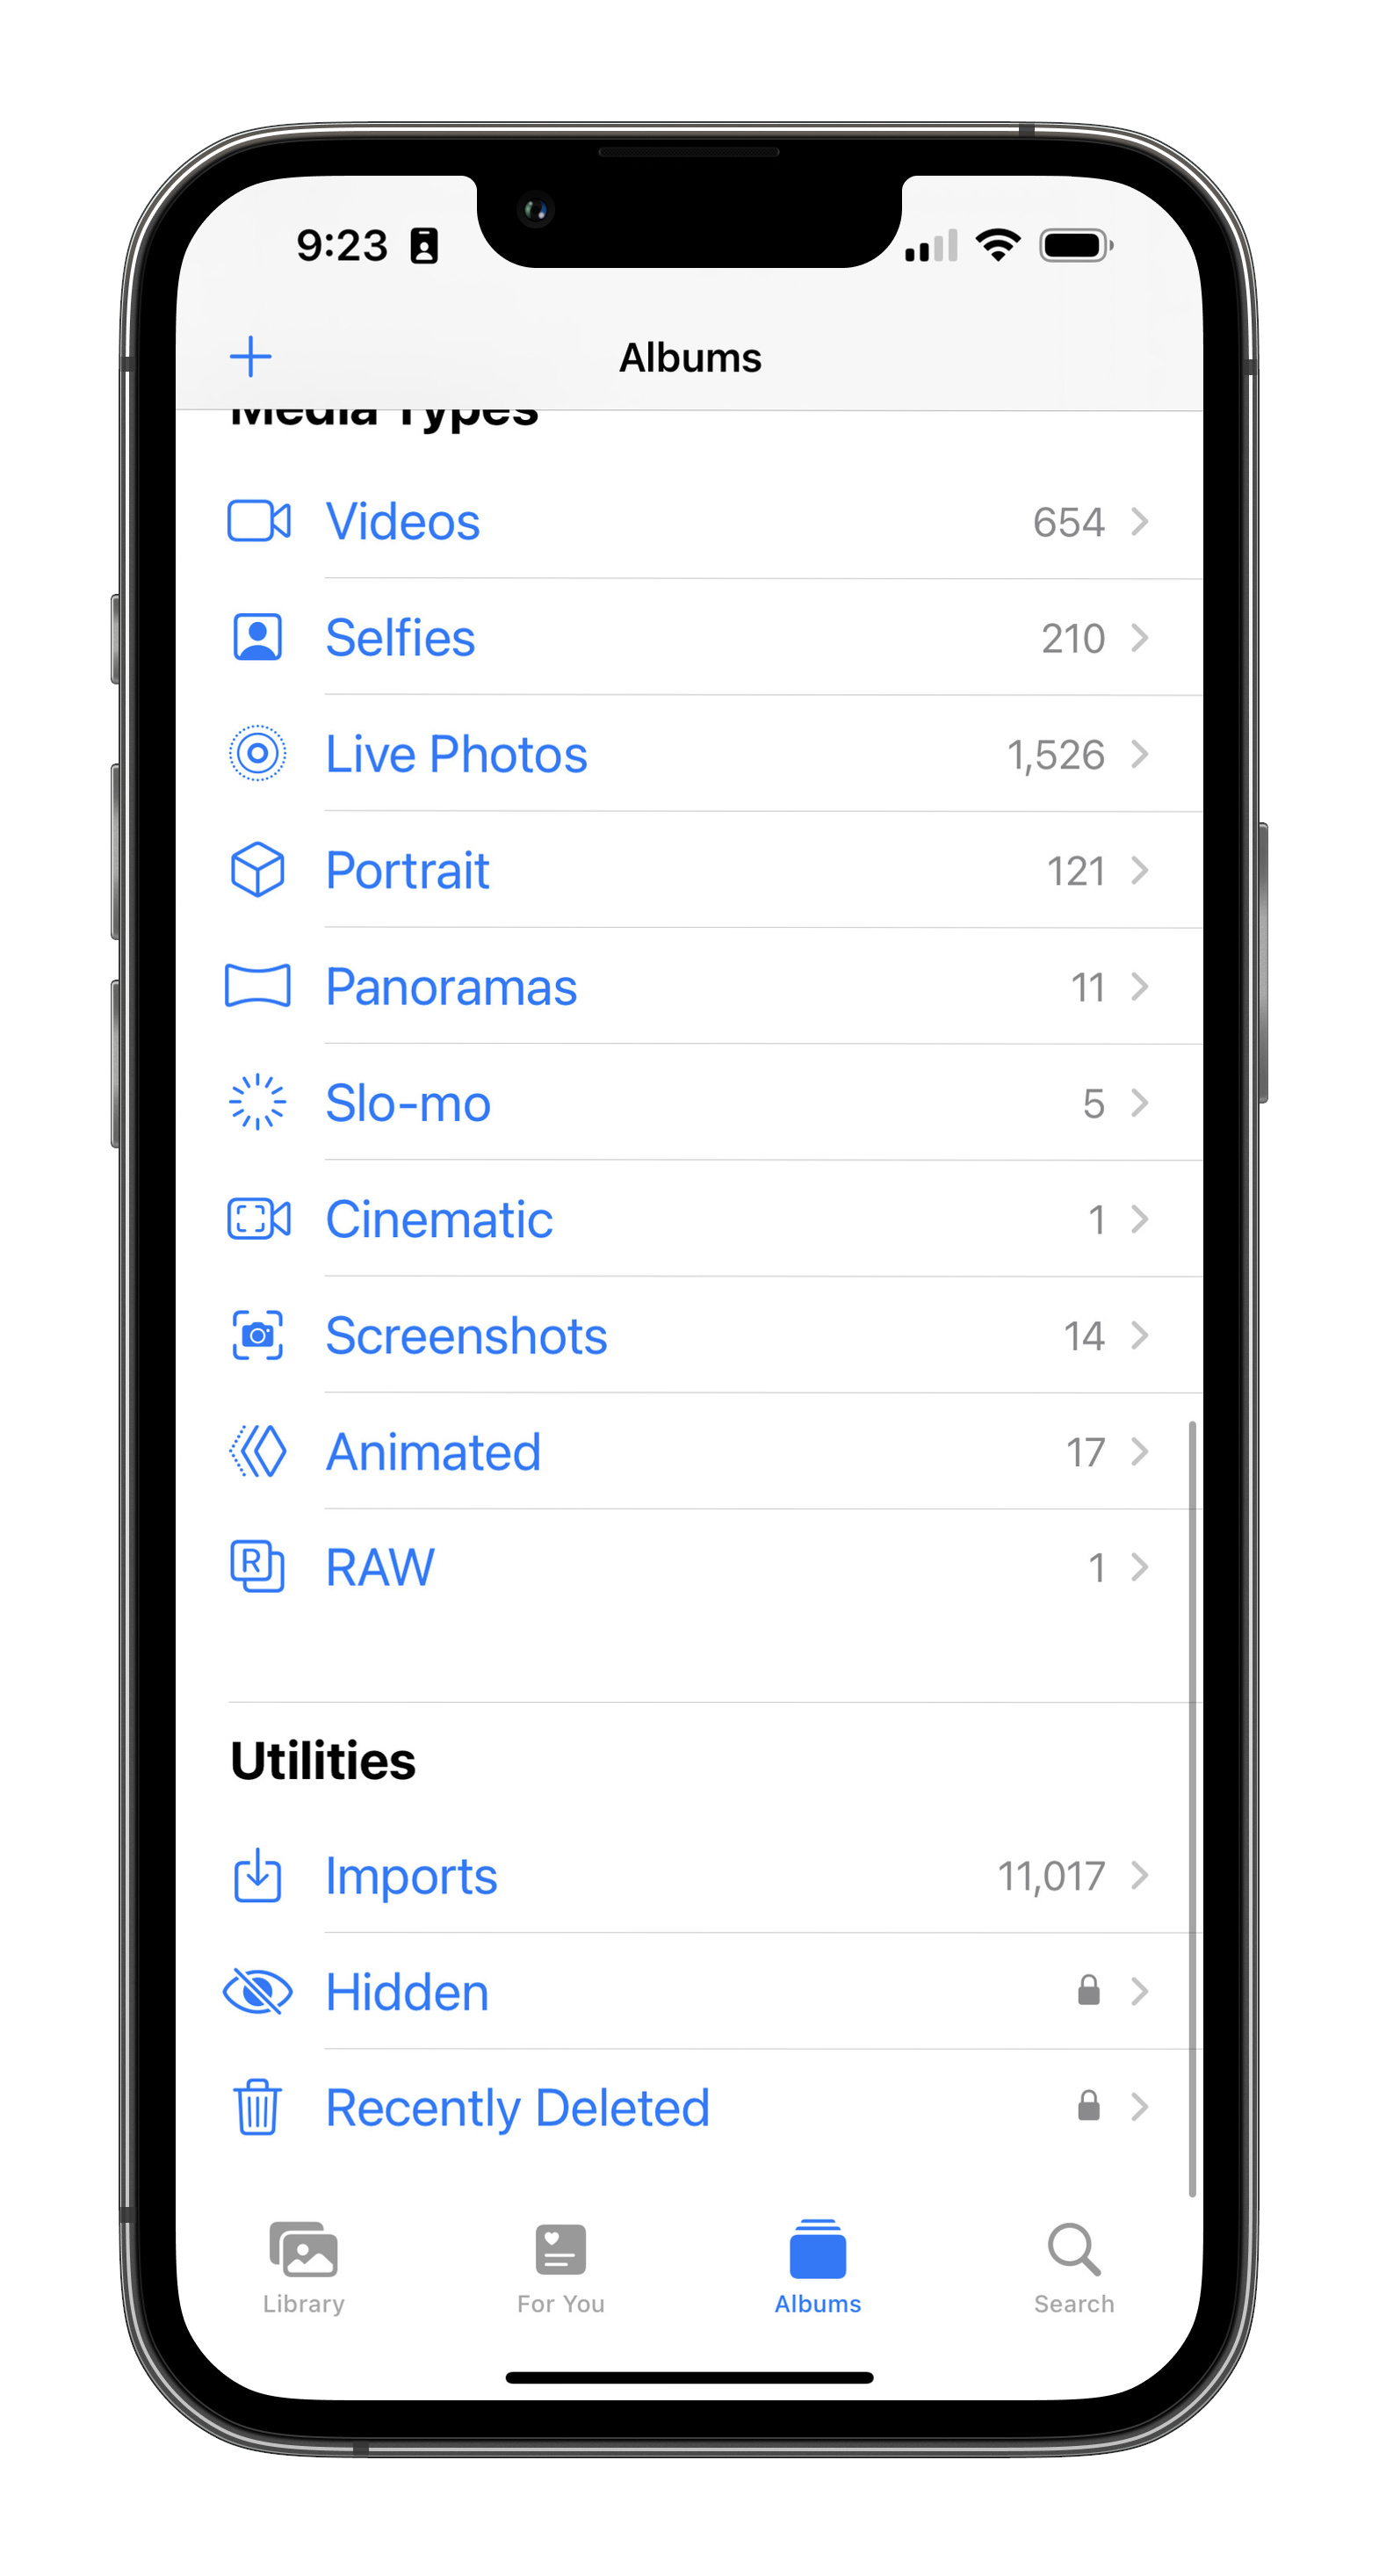
Hidden photos are moved to a dedicated Hidden album, which can be found on the Albums page and under the Utilities section there. Furthermore, your Hidden album can only be viewed after unlocking it with Face ID, Touch ID, or your device’s PIN code.
Step 1: Open the Photos app on your iPhone, iPad, or iPod Touch.
Step 2: Find the photos you need to hide.
Step 3: Tap the Select button located in the top-right corner to open up the multi-selection menu.
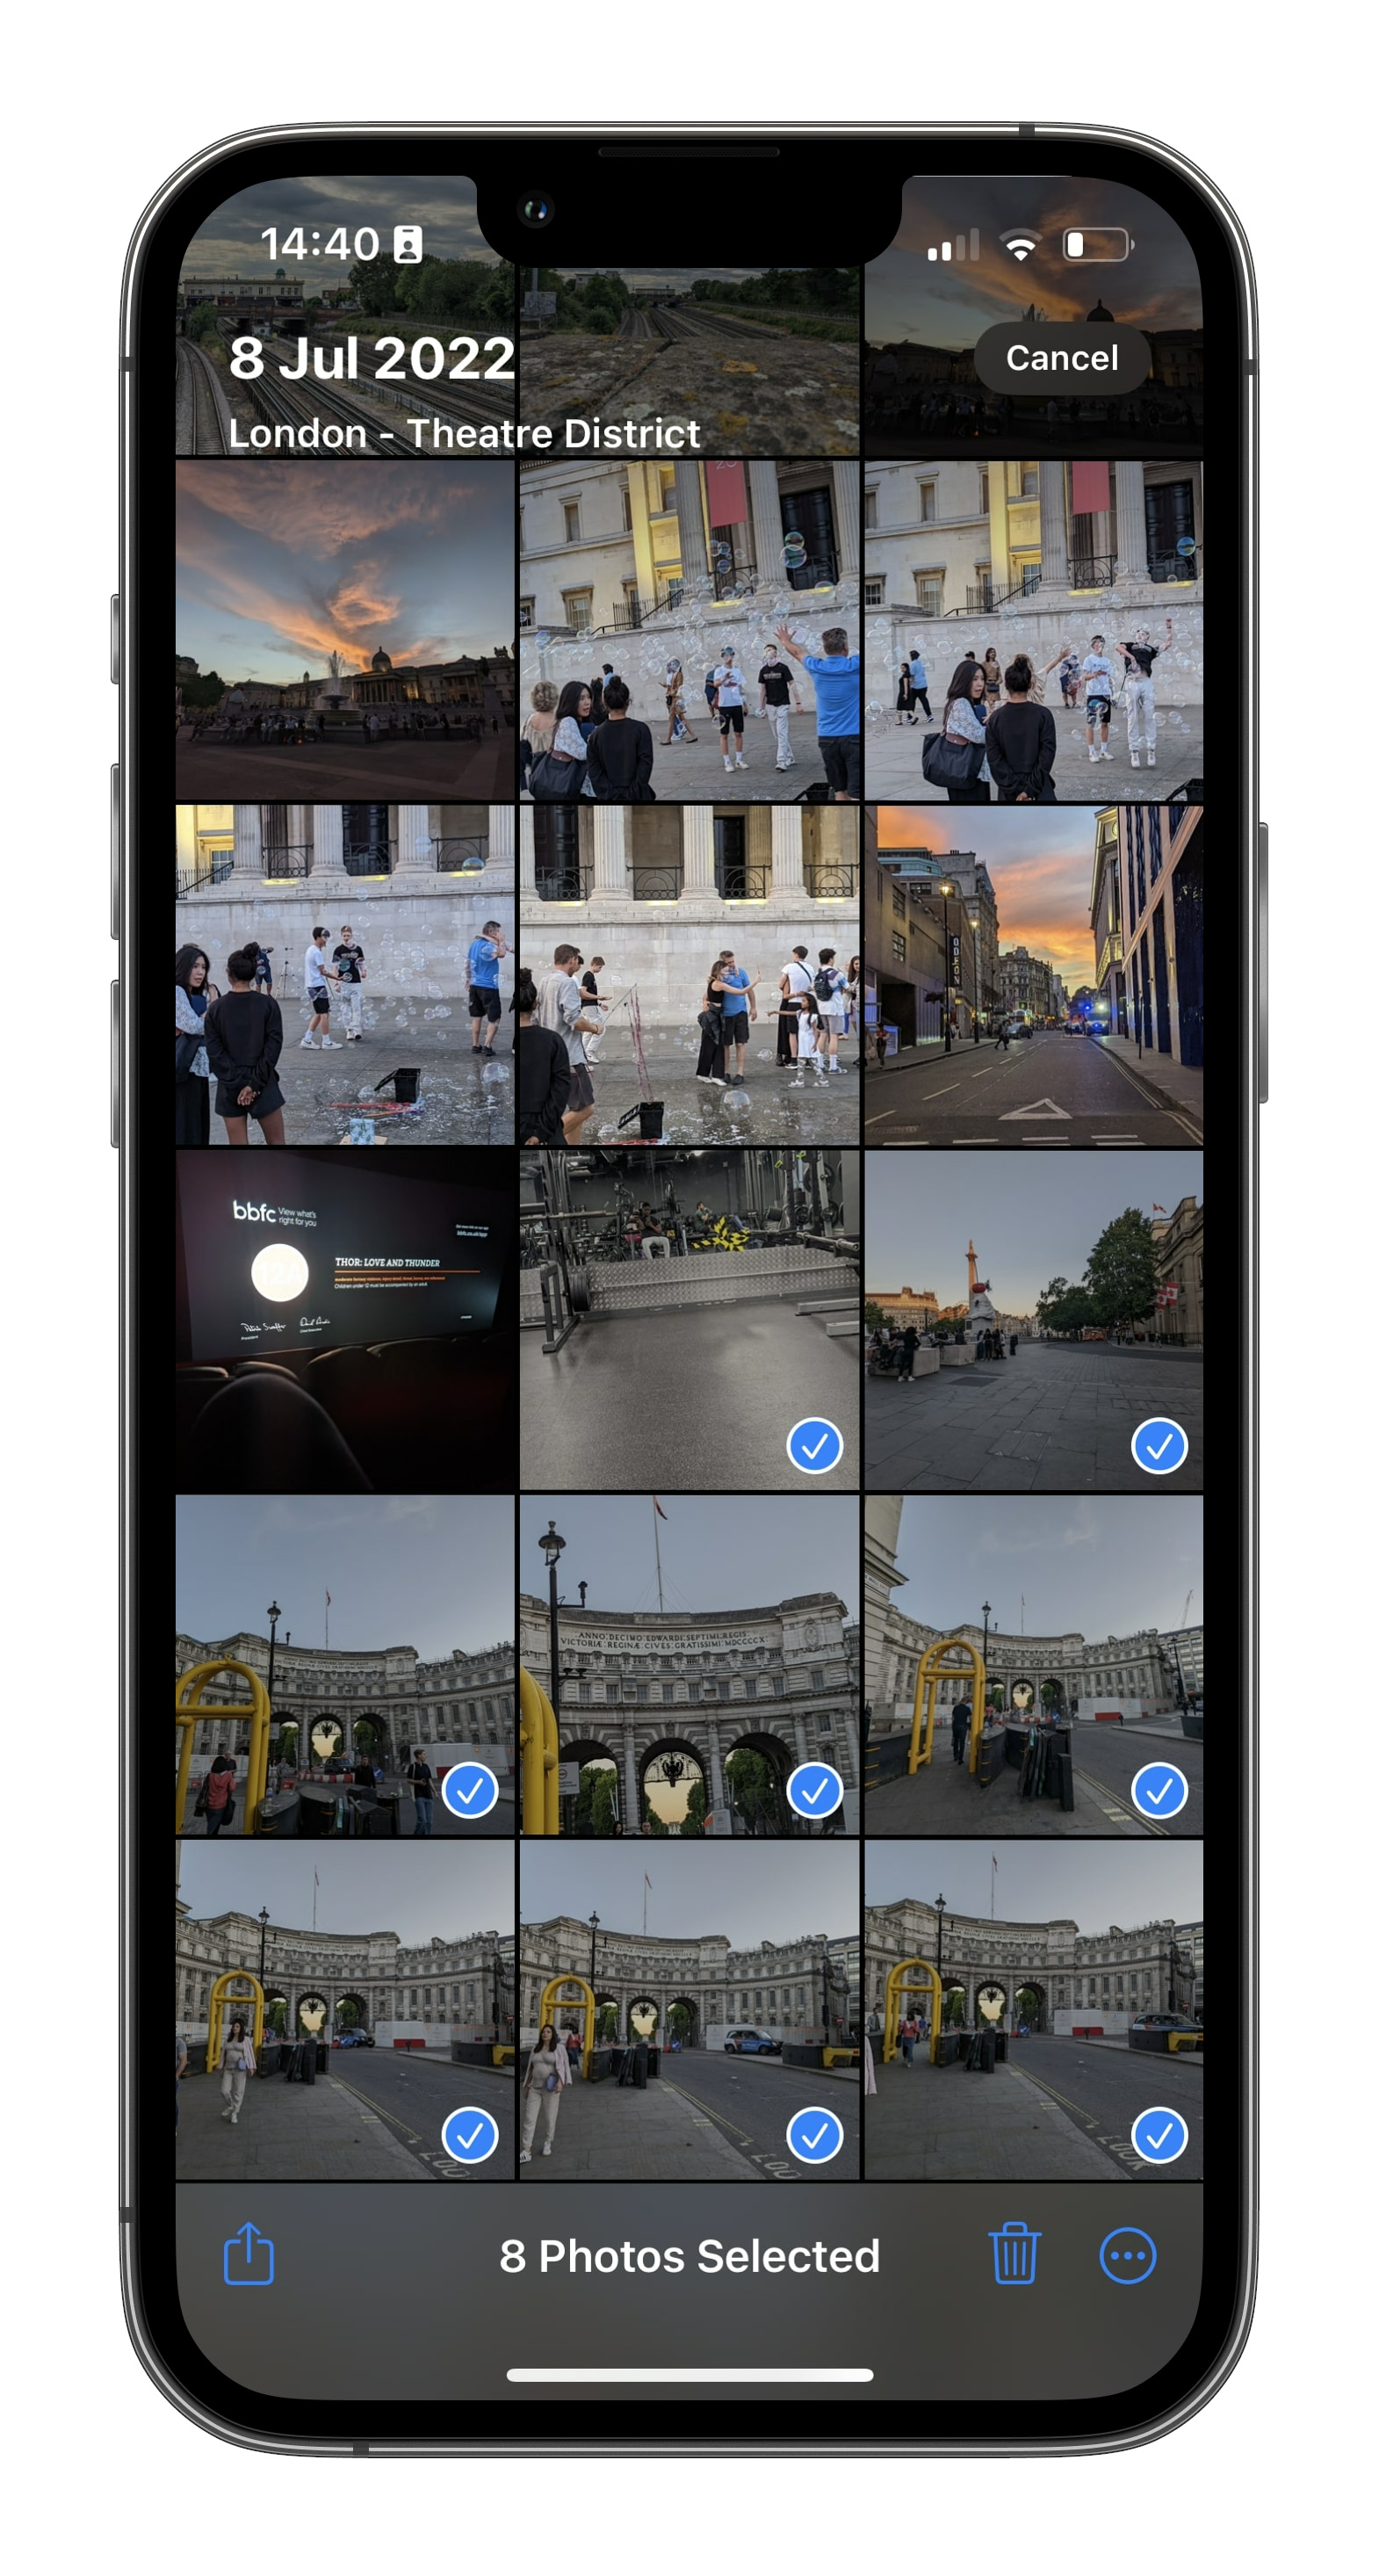
Step 4: Tap on every photo you’d like to hide.
Step 5: Tap the Overflow icon displayed in the bottom-right corner. It looks like (…).
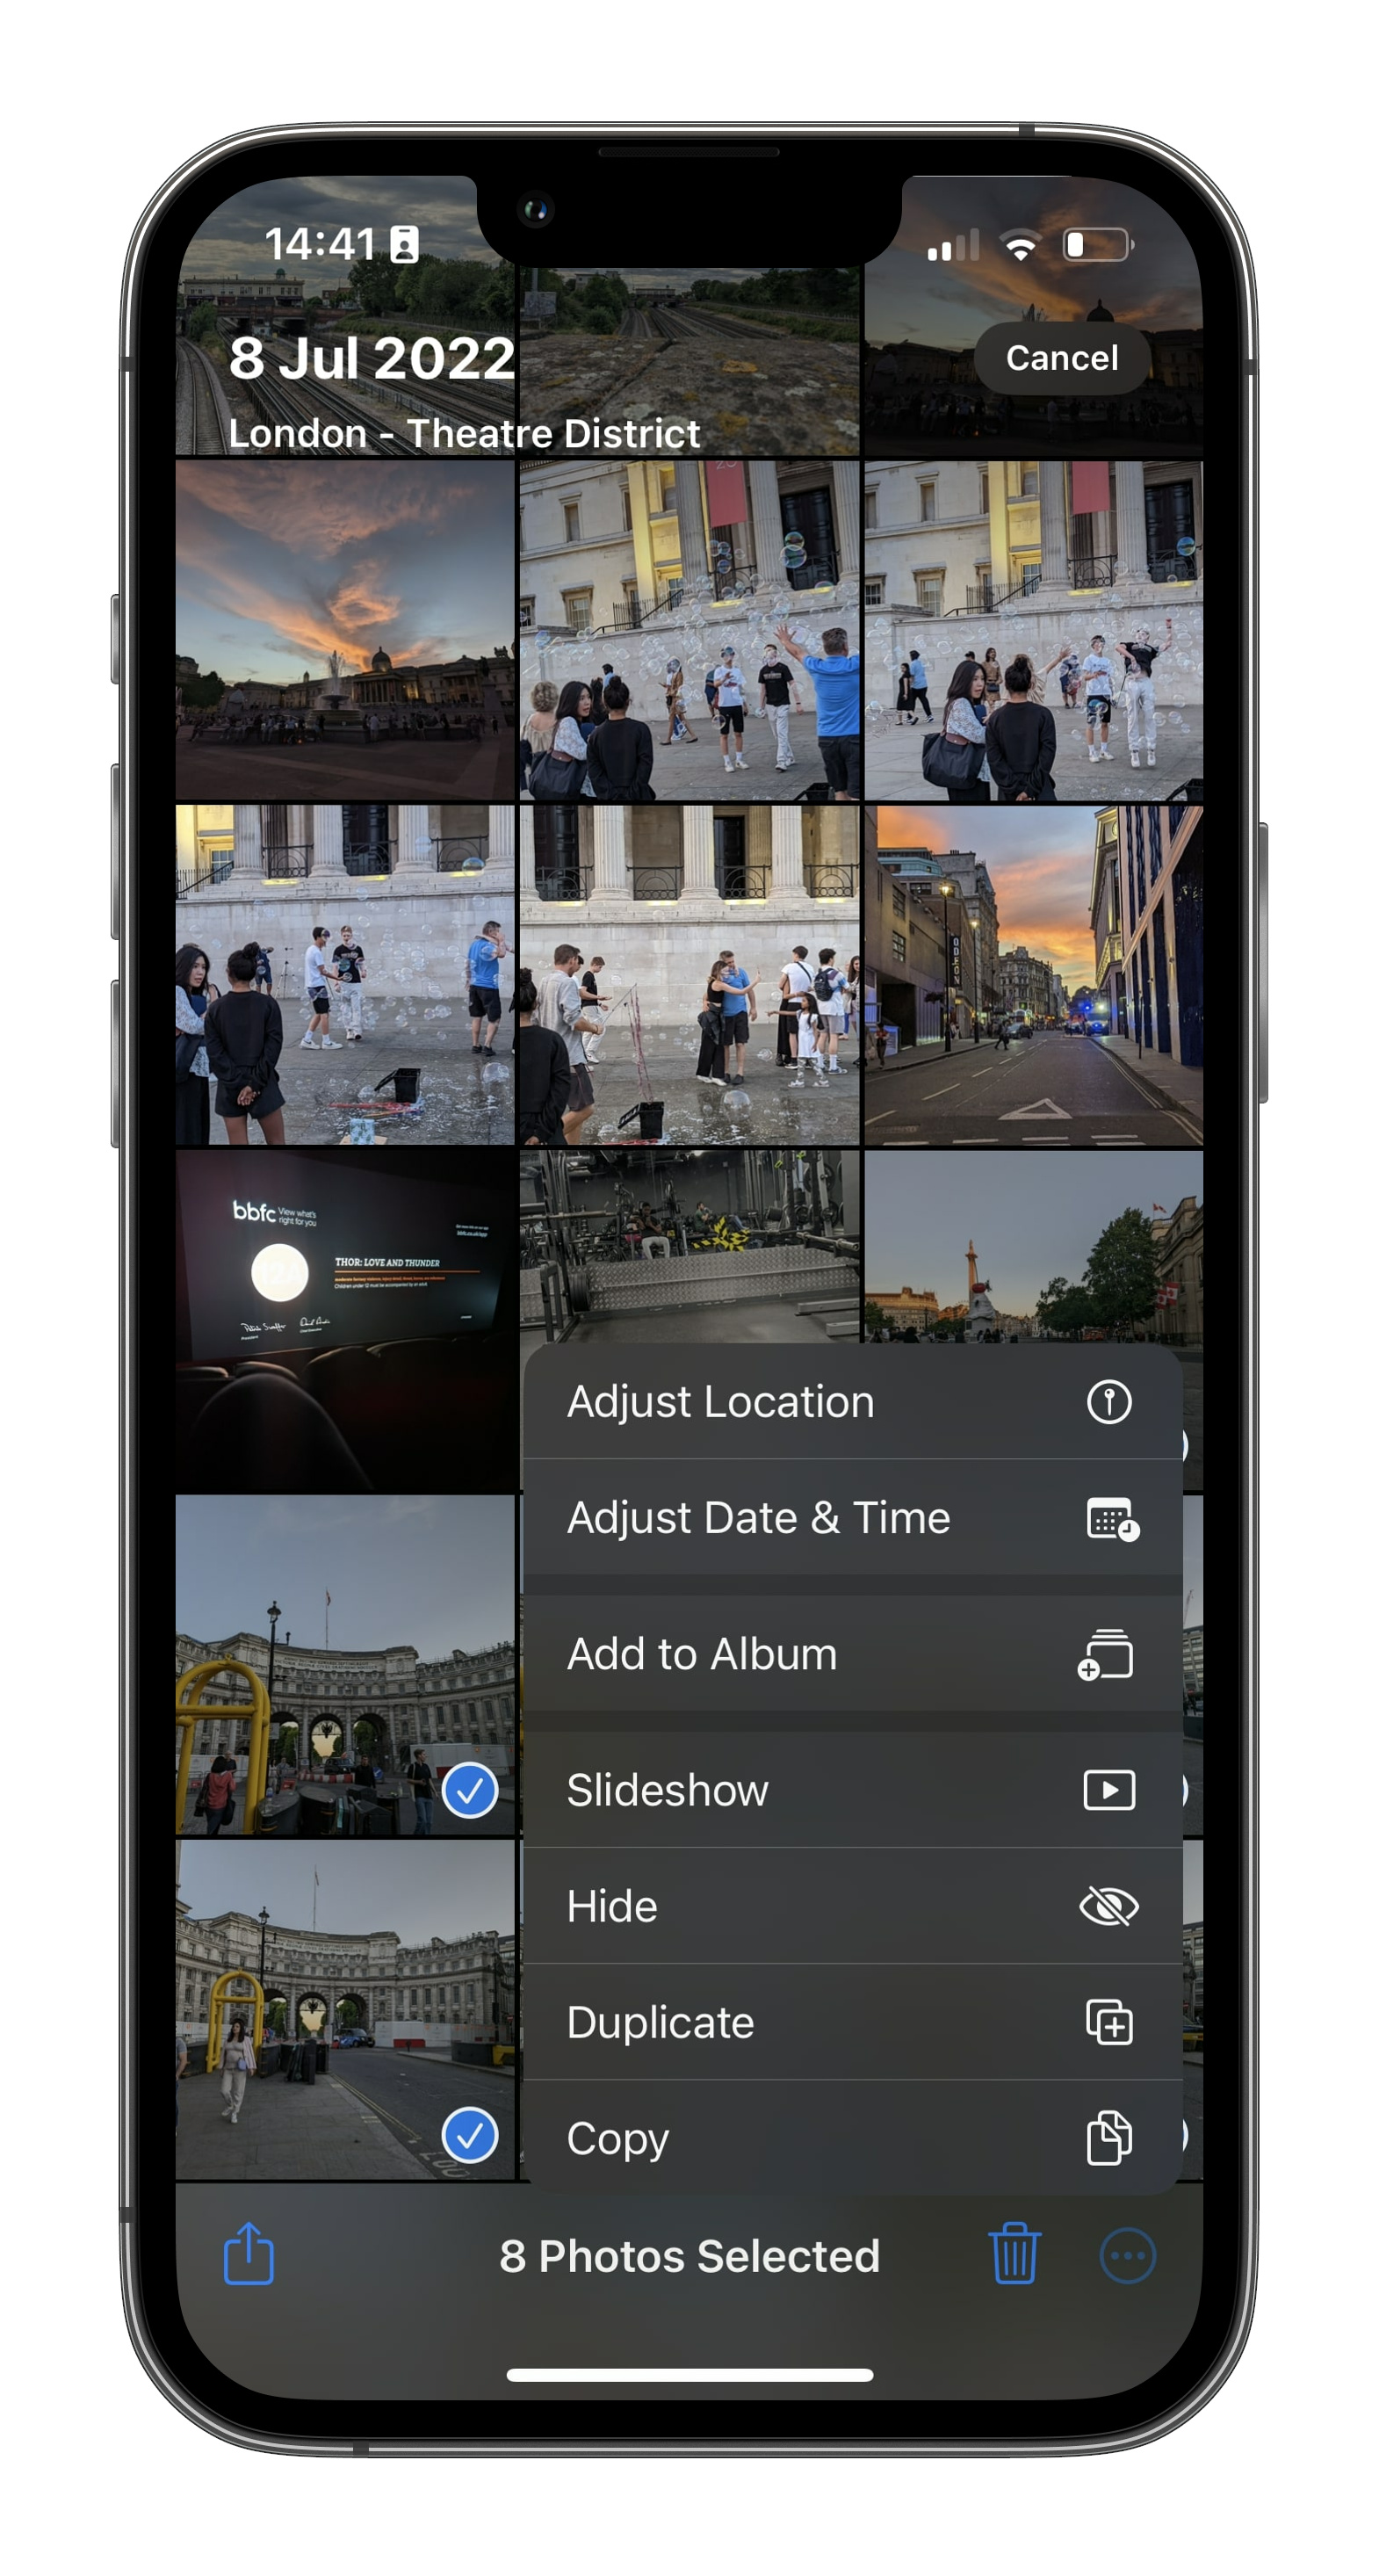
Step 6: Select the Hide option.
Step 7: The selected photos will now move to the Hidden album listed under Utilities on the Albums tab.
How to unhide or view hidden photos
Unhiding or viewing hidden photos is as easy as navigating to the Album page and scrolling all the way down. We’ll show you how.
Step 1: Tap to open the Photos app.
Step 2: Tap the Albums tab listed at the bottom.

Step 3: Scroll down and tap the Hidden folder listed under Utilities. You’ll have a Face ID or Touch ID prompt at this point to enable access.
Step 4: Tap the Select button displayed in the top-right corner.
Step 5: Tap on every photo that you want to unhide.
Step 6: Tap the Overflow button located in the bottom-left corner. As before, it resembles an ellipsis enclosed by a circle.
Step 7: Tap the Unhide option on the pop-up menu. The photos will then move back to their original spots. Alternatively, you can tap Add to album to move them to a specific album.
Editors’ Recommendations
Services Marketplace – Listings, Bookings & Reviews