The ability to send an email at a later date or at a different time is a useful feature in Microsoft Outlook. You might be composing several emails before you leave for the day or trying to stay on top of your email replies, but you don’t want to send the emails immediately. You can pick the date and time to send your email once you’ve composed it. Here’s how to schedule an email in Outlook on Windows, Mac, and the web.
Schedule an Outlook email on Windows
Scheduling an email to send later in Outlook on Windows takes only a few clicks.
Step 1: Open Outlook on Windows and click New email or reply to an existing message.
Step 2: Compose your email, add the recipient, and enter the subject line as normal.
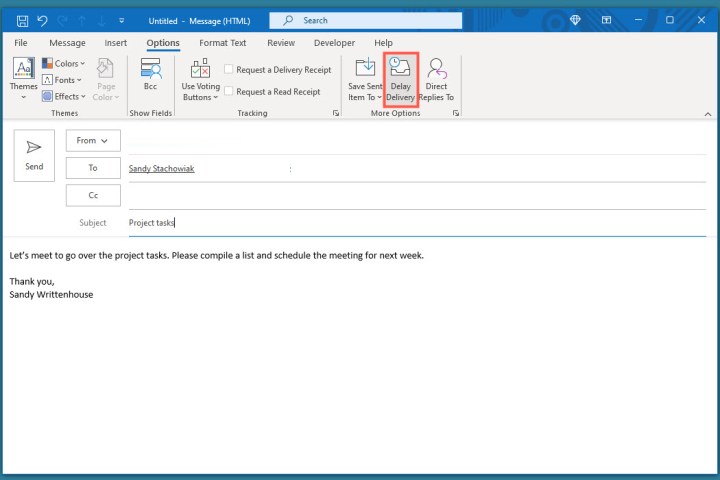
Step 3: Go to the Options tab in the message window and select Delay delivery in the ribbon.
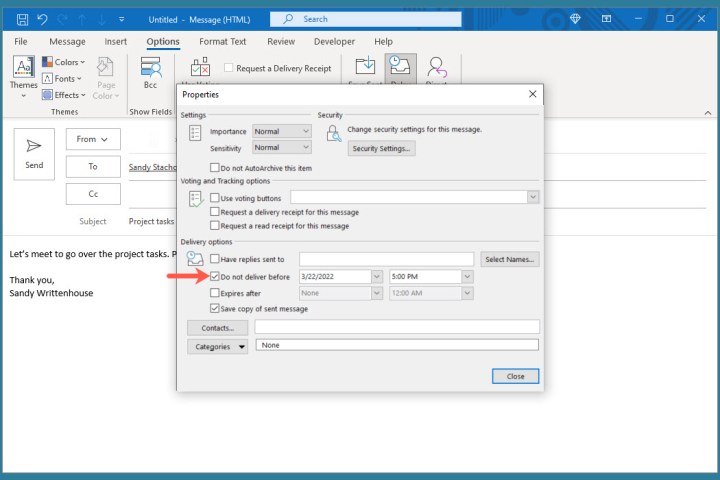
Step 4: In the Properties box that opens, go down to the Delivery options section. Check the box for Do not deliver before and choose the date and time to send the email.
Step 5: Click Close to exit Properties.
Step 6: You’ll return to the email window. Click Send to send the message later.
Step 7: To view, edit, or cancel a scheduled email, go to your Outbox folder.
Schedule an Outlook email on Mac
You can schedule an email in the classic or new version of Outlook on Mac the same way.
Step 1: Open Outlook on Mac and click New email or New message depending on your version. Alternatively, you can reply to an existing message.
Step 2: Compose your email, add the recipient, and enter the subject line as you normally would.
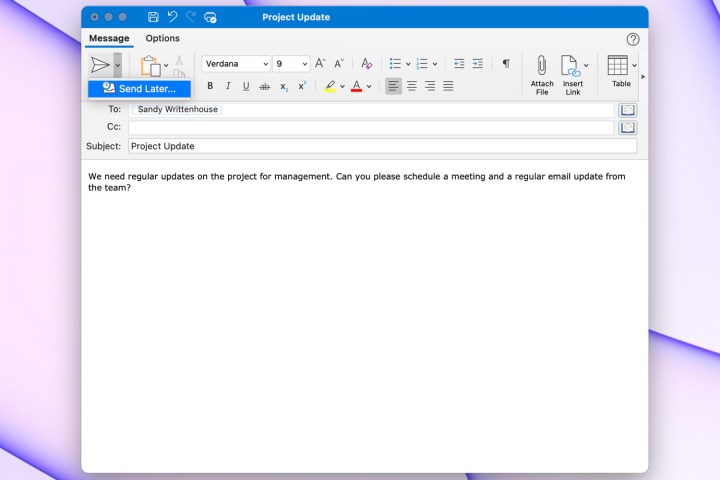
Step 3: When you’re ready to schedule the email, click the arrow to the right of the Send button at the top and choose Send later.
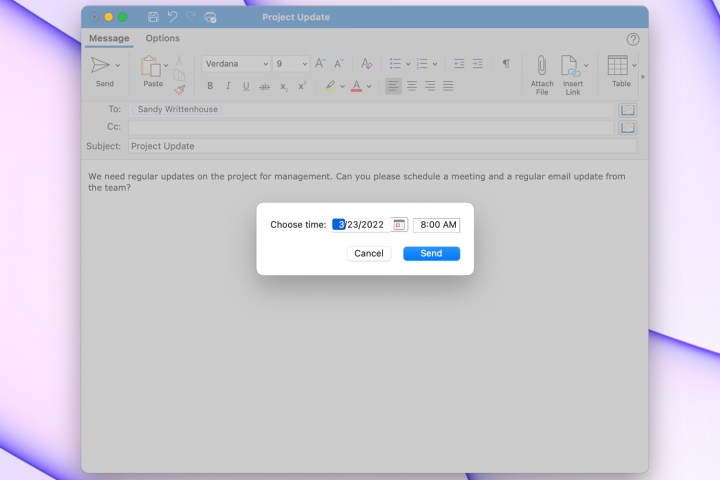
Step 4: Select the date and time and click Send.
Step 5: To view or cancel an email you’ve scheduled, head to your Drafts folder.
Schedule an Outlook email on the web
If you use the web version of Microsoft Outlook, you can schedule an email there as well.
Step 1: Visit Outlook on the web, sign in, and click New message on the top-left or reply to an existing email.
Step 2: Compose your email, add the recipient, and enter the subject line as normal.
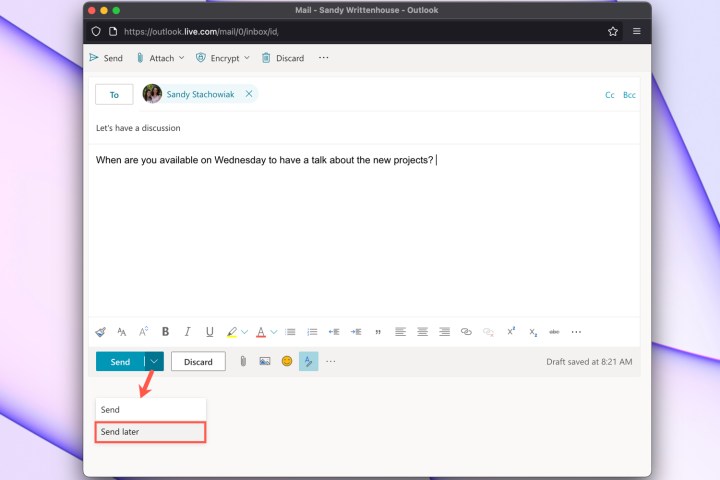
Step 3: To schedule the email, click the arrow to the right of the Send button at the bottom and choose Send later.
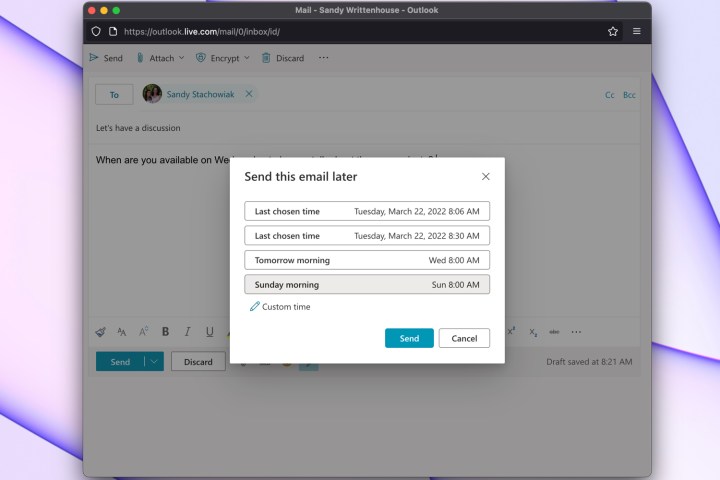
Step 4: Select one of the suggested date and times or pick Custom time to enter your own.
Step 5: Click Send.
Step 6: To view a scheduled email, edit it, or cancel the sending of it, open your Drafts folder.
For similar features, learn how to schedule a Skype call through Outlook. Or, for ways to manage your inbox, take a look at how to stop spam emails.
Editors’ Recommendations
Services Marketplace – Listings, Bookings & Reviews
