If you’re completely new to Microsoft Word, you’re probably wondering where to begin. You’ve come to the right place because we’ll get you started. From what you see in the Word window to how to save a document, this Word Tutorial for Beginners is for you.
Note: The information in this tutorial applies to Microsoft Word for 365 on Windows. While you may see varying terms, tool locations, or available options, most Word versions have the same basic features. Once you have whatever version you’re using downloaded and installed, you can jump right in.
How to create a new document
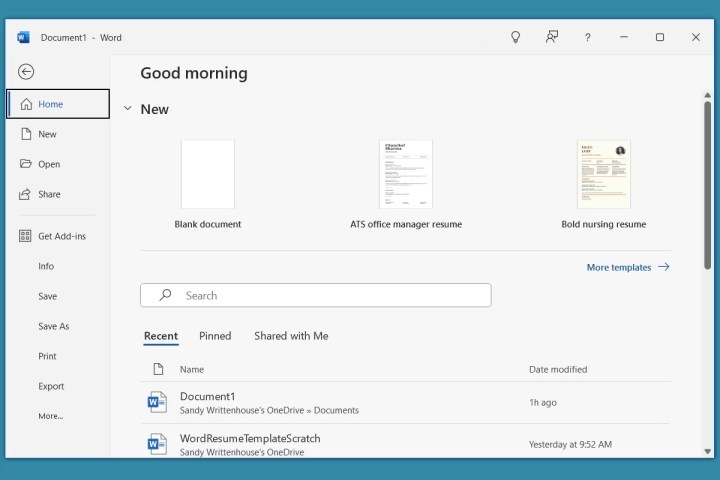
When you open Microsoft Word, you can create a new empty document or use a built-in template. To best get familiar with the application and the features we explain here, select a Blank document on the Home screen and follow along!
How to name and save document files
One of the most important things to learn about using Microsoft Word is naming and saving your documents. There’s nothing worse than putting hours of work into a document, only to find out you didn’t save it before closing it.
A good habit to start is to name and save the document as soon as you begin. You can then continually save it with the same name as you work on it. Another option is to use AutoSave, which is available to Microsoft 365 subscribers.
- To name and save a new document, go to the File tab and select Save.
- Choose a location to save the file and enter a name for it. By default, Word saves your document as a DOCX file format that is specific to Word. (Older versions of Word use the default DOC format.) Optionally, you can pick a different format below the file name if necessary
- Select Save.

As you work on your document, you can use the Save button in the Quick Access Toolbar at any point. Alternatively, select File > Save. This ensures you won’t lose your work.

How to use AutoSave
To use AutoSave, you must subscribe to Microsoft 365. With this feature, the document saves occasionally and automatically as you work on it, which is convenient. It’s important to note that the file must be saved to OneDrive not locally on your device.
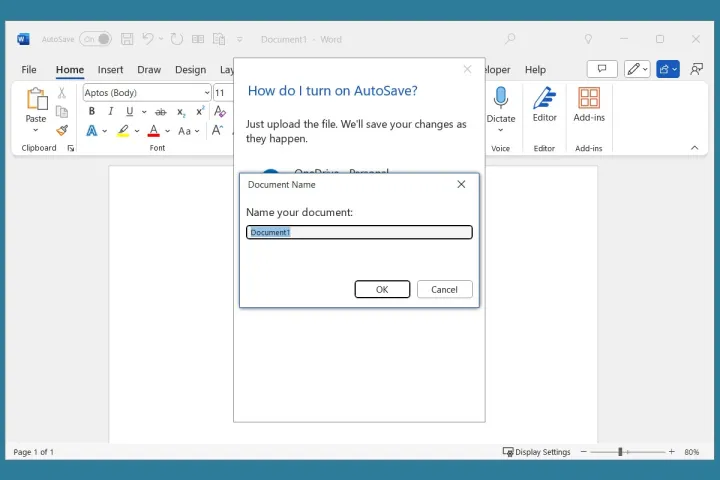
- To enable the feature, turn on the AutoSave toggle in the title bar.
- Select the OneDrive account if you have more than one.
- Enter a name for the file and choose OK.
 Digital Trends
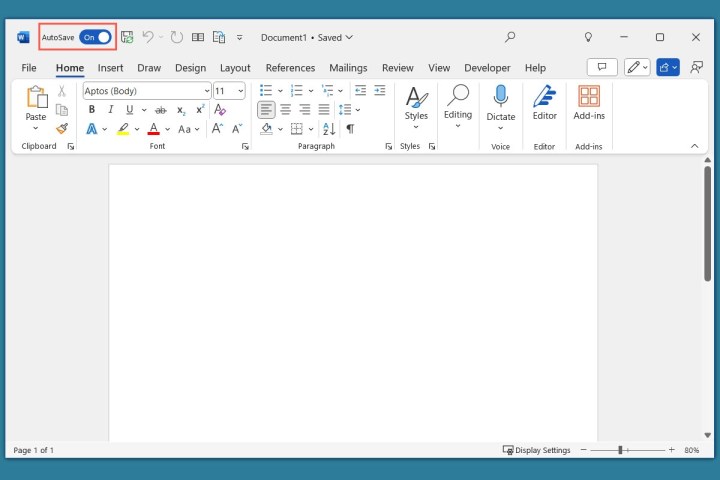
You’ll then see the AutoSave toggle enabled as you work on your document.
Get to know the interface
The next important aspect to learn about Microsoft Word is what you see in the application’s window.
Title bar: This is the bar at the very top of the window. It contains the Quick Access Toolbar on the left, which holds handy buttons like Save and Undo, the document name, the Search feature, and buttons to control the window.
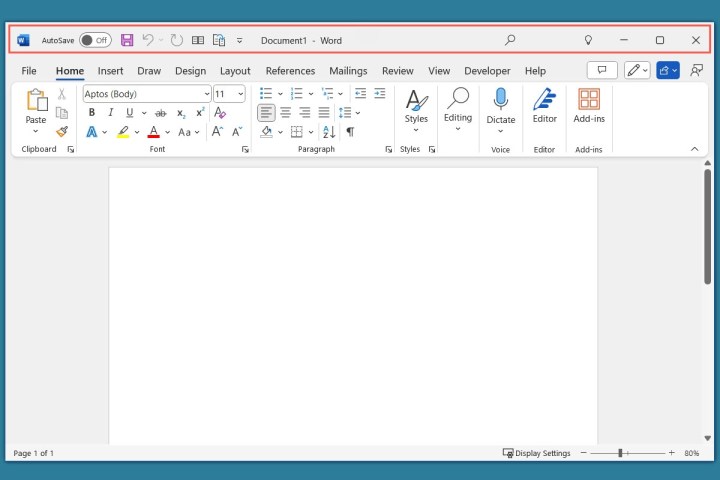
Tabs: Below the title bar is the tab row. You’ll see tabs for Home, Insert, Draw, Design, Layout, and more. You open the tab you need to perform a task using the tools on the ribbon.

One exception is the File tab on the far left, which doesn’t have a ribbon. Instead, you’ll see a navigation on the left side that allows you to save, print, export, close, and access the settings. You can also use the right side on the File tab to create new documents and open recent ones.
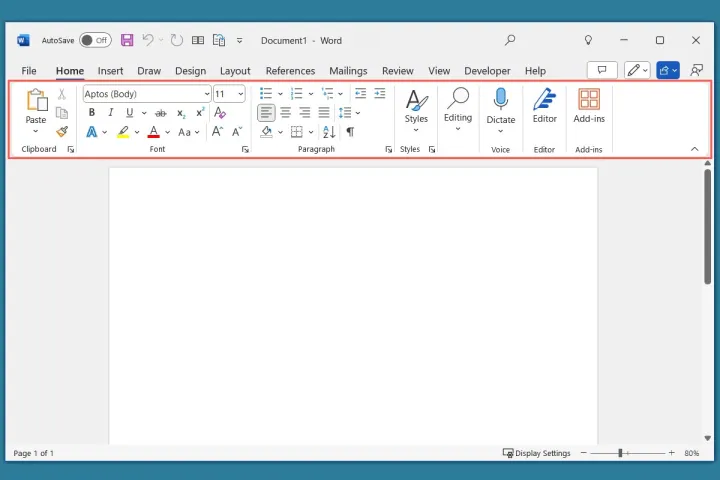
Ribbon: Below the tab row is the ribbon that holds buttons and menus. When you open a tab, you’ll see tools in the ribbon for that particular tab. For instance, if you want to change your document’s appearance, you’d go to the Design tab and see tools for themes, formatting, colors, and page color.
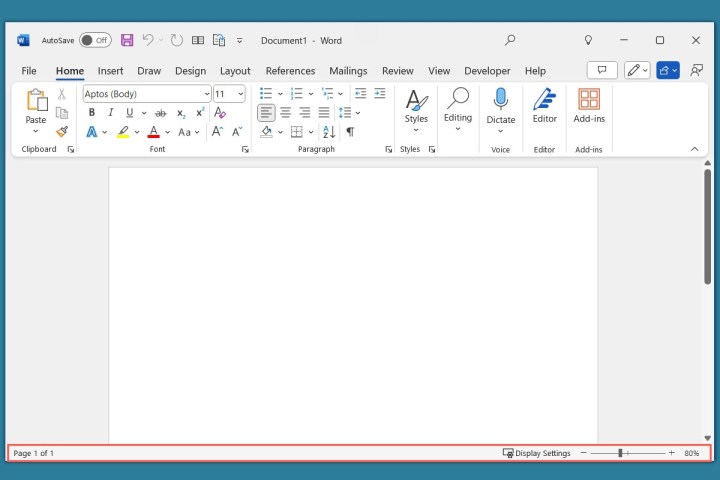
Status bar: This is the bar at the bottom of the window. You can customize this area to show commonly needed details like page number, indicators like caps lock, and options for zoom. Right-click the Status bar to add or remove items.
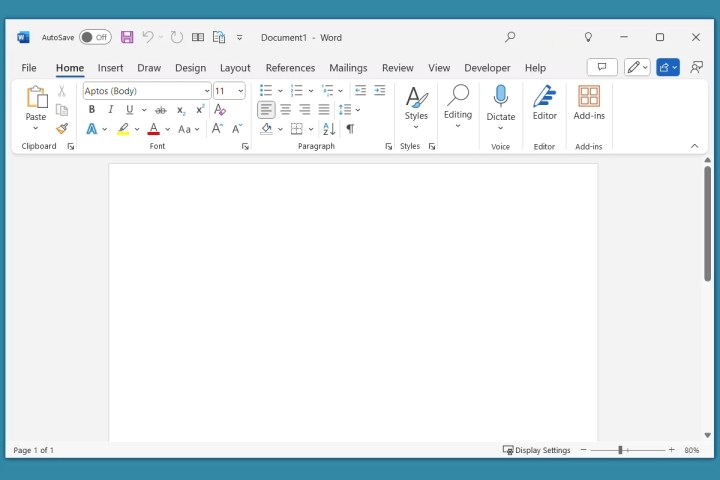
The center of the Word window is the document workspace where you can simply begin typing to create an essay, article, report, résumé, and similar.
How to use the tabs and ribbon
As mentioned above, the ribbon holds buttons and menus that allow you perform actions. The ribbon is divided into sections, or groups, to help you find the tool you need.
The ribbon tools adjust depending on which tab you select. So, when you open each tab, you’ll see a different set of tools. Additionally, when you open a tab, it’s selected and you’ll see it underlined
Because there are many tools on the ribbon for each tab, here are just some of the most commonly used tabs and options.
Home tab
The Home tab’s ribbon contains the most basic actions you’d perform when creating a document. You have the Clipboard group to copy, cut, and paste; the Font group for style, size, bold, italics, and color; the Paragraph group for alignment, lists, spacing, and indents; and the Styles group with preformatted options such as titles, subtitles, headings, quotes, and emphasis.
You can also enable dictation, shop for add-ins, and open the Word Editor.
Insert tab
The Insert tab is where you go when you want to insert items aside from text in your document. You have the Illustrations group for pictures, shapes, icons, and charts; the Media group for video and audio; and the Header & Footer group for adding these document items.
You’ll also see tools to add a table, hyperlink, comment, WordArt, equations, and symbols.

Draw tab
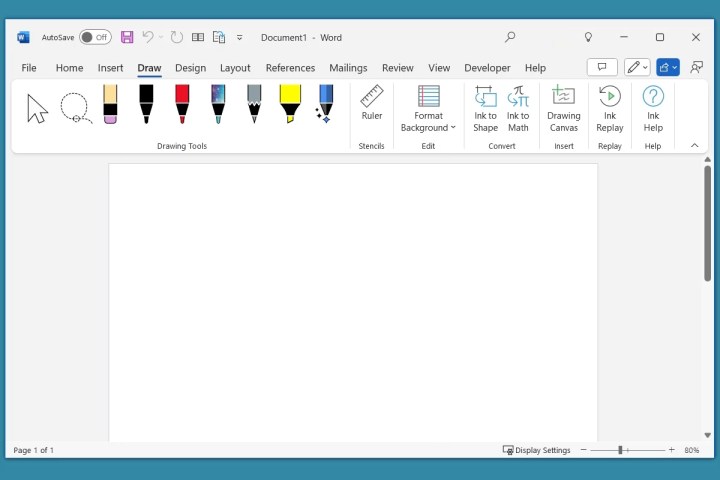
The Draw tab lets you use pens, markers, and highlighters to draw on your document. You can also format the background, convert ink to a shape or math, and use the stencil.
Design tab
The Design tab gives you ways to change the appearance or style of your document. You can select from Themes, which provide colors and fonts, and Document Formatting, which provides structure with titles and headings.
You also have Page Background tools for adding a watermark, changing the background color, and applying page borders.

Layout tab
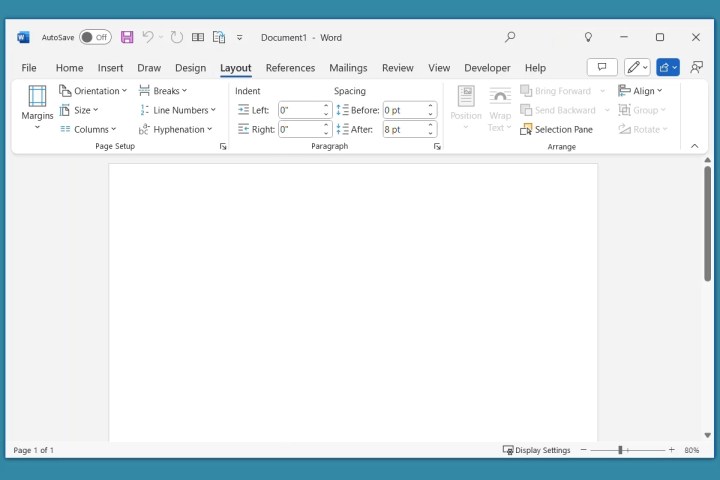
The Layout tab lets you change the structure of a document. You have the Page Setup group to adjust the margins, orientation, size, columns, and breaks; the Paragraph group for indent and spacing settings; and the Arrange group for wrapping text, aligning objects, and moving items forward or backward.
References tab
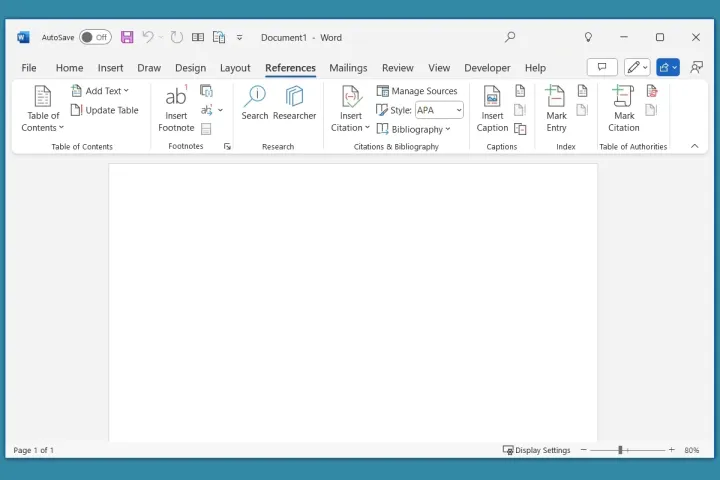
The References tab is where you go to add a table of contents, citations, a bibliography, captions, footnotes, and a table of figures. You can also use the Researcher tool and mark entries for things like an index and table of authorities.
Mailings tab
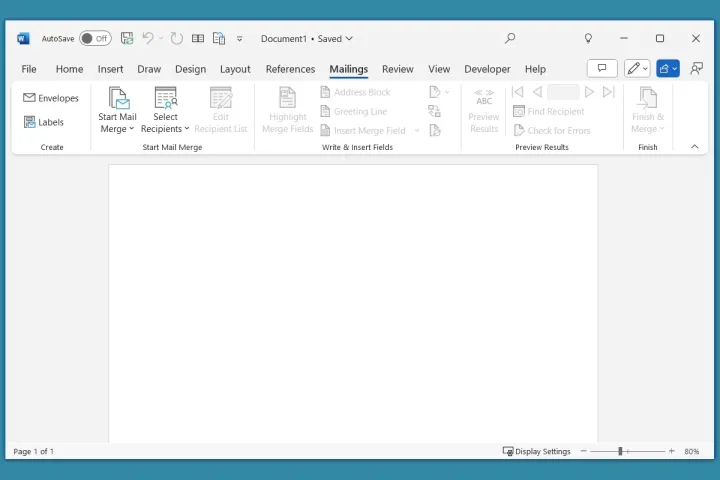
The Mailings tab provides tools for setting up a mail merge in Word. You can create letters, emails, labels, envelopes, and a directory. All tools on this tab are for mail merge.
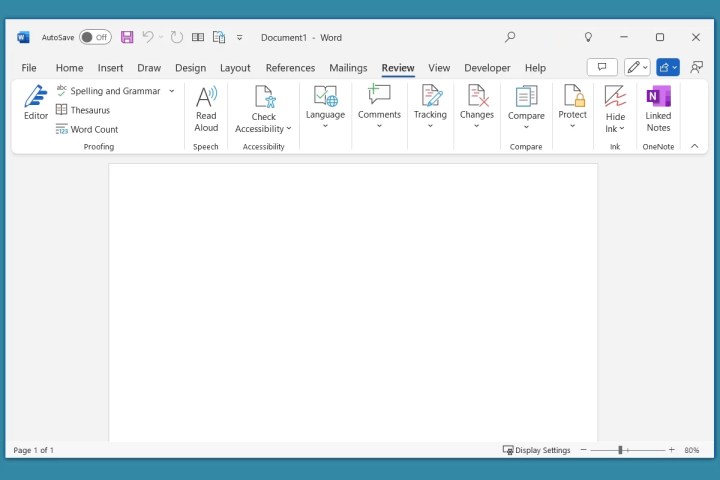
Review tab
The Review tab contains tools for spelling and grammar checking, accessibility checking, translating, and language. You’ll also use this tab if you collaborate with others on the document and want to track the changes everyone makes.
View tab
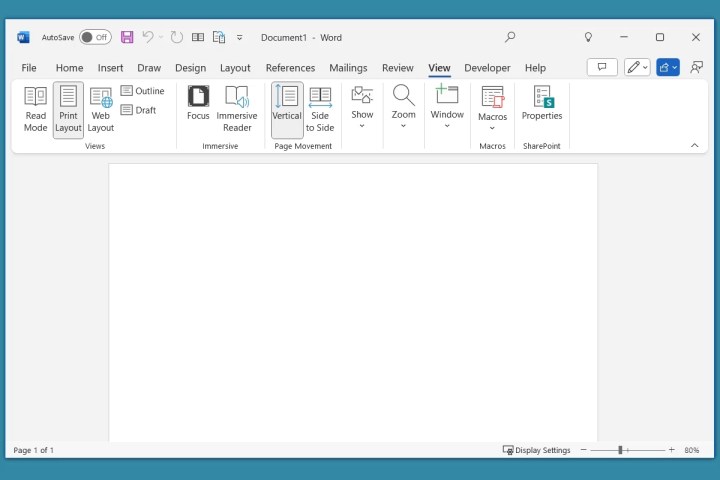
The View tab allows you to switch from Print Layout to Web Layout to Outline or Draft view. You can also show or hide tools like the ruler and gridlines, zoom in and out, display multiple pages at once, and arrange Word windows if you have more than one open.
Temporary tabs
While you’ll always see the above tabs in Word by default, you may also see a few temporary tabs display. These tabs appear when you select (click) an item in your document and disappear when you deselect the item.
For example, if you insert a shape, you’ll see the Shape Format tab display, or if you insert an image, you’ll see the Picture Format tab display.
Each temporary tab provides you with ribbon tools specific to the item. Here, you can see we selected a shape that we inserted and the Shape Format tab displays on the right of the tab row. Tools on the ribbon allow us to format the shape and text inside it, as well arrange and resize the shape.

Now that you have the basics for using Microsoft Word, be sure to explore the tabs and tools to see how they can help you create fantastic documents. When you’re ready to move on, check out our other Word articles like things you didn’t know you could do in Word, along with tricks that can boost your Word workflow.
Services Marketplace – Listings, Bookings & Reviews
