Much like in the main campaign of Resident Evil 4, the Separate Ways DLC features a variety of merchant requests to complete and turn in for some Spinel, which can be used to purchase useful upgrades, keys, and more. You’ll stumble upon two of these requests asking you to find and kill bugs – once in Chapter 5 and again in Chapter 6. In this guide, we’ll tell you where to find them.
Chapter 5 bug locations
The first Bug Buster merchant request can be found as a blue note in plain sight near the merchant toward the end of Chapter 5. After you accept the request, you’ll find yourself tasked with tracking down and eradicating this chapter’s three hidden bugs. When you’re ready to take them out, begin by heading further into the caverns with your gun at the ready.
Bug No. 1
A little way into the caverns will be a lever you have to pull to make some giant pillars move up and down. Carefully make your way between the first and second pillars here, then look up at the ceiling to see the first bug.

Bug No. 2
After making your way through just a bit more of the level, you’ll eventually head up a long flight of stairs that will lead you out of the caverns. After taking out the group of enemies on the landing here, turn around and look back at the stairs you just came up to see the second bug on the ceiling.

Bug No. 3
After clearing this area a bit more, you’ll eventually reach a ladder leading up to the end of the level. Before going up this ladder, look up and to the left to spot the third bug on the wall.
Chapter 6 bug locations
The second Bug Buster merchant request can be found as a blue note in plain site near the merchant in Chapter 6. This time, you’ll once again be tracking down three total bugs, except this time it will be while getting bombarded with mass amounts of gunfire! When you’re ready to get started, hop over the ledge where you picked up the request.
Bug No. 1
Once you’ve jumped down into the open area to take cover to avoid machine gun fire, you can see the first bug on the wall to the left. Due to all of the commotion in this area, you may want to wait until you’ve made it up the ladder on the right side, so you can then turn around and safely look for and shoot it.

Bug No. 2
After clearing your way through this area a bit further, you’ll eventually have to run quickly across a bridge to once again avoid machine gun fire. On the other side of the bridge, look up at a tower ahead to spot the second bug.

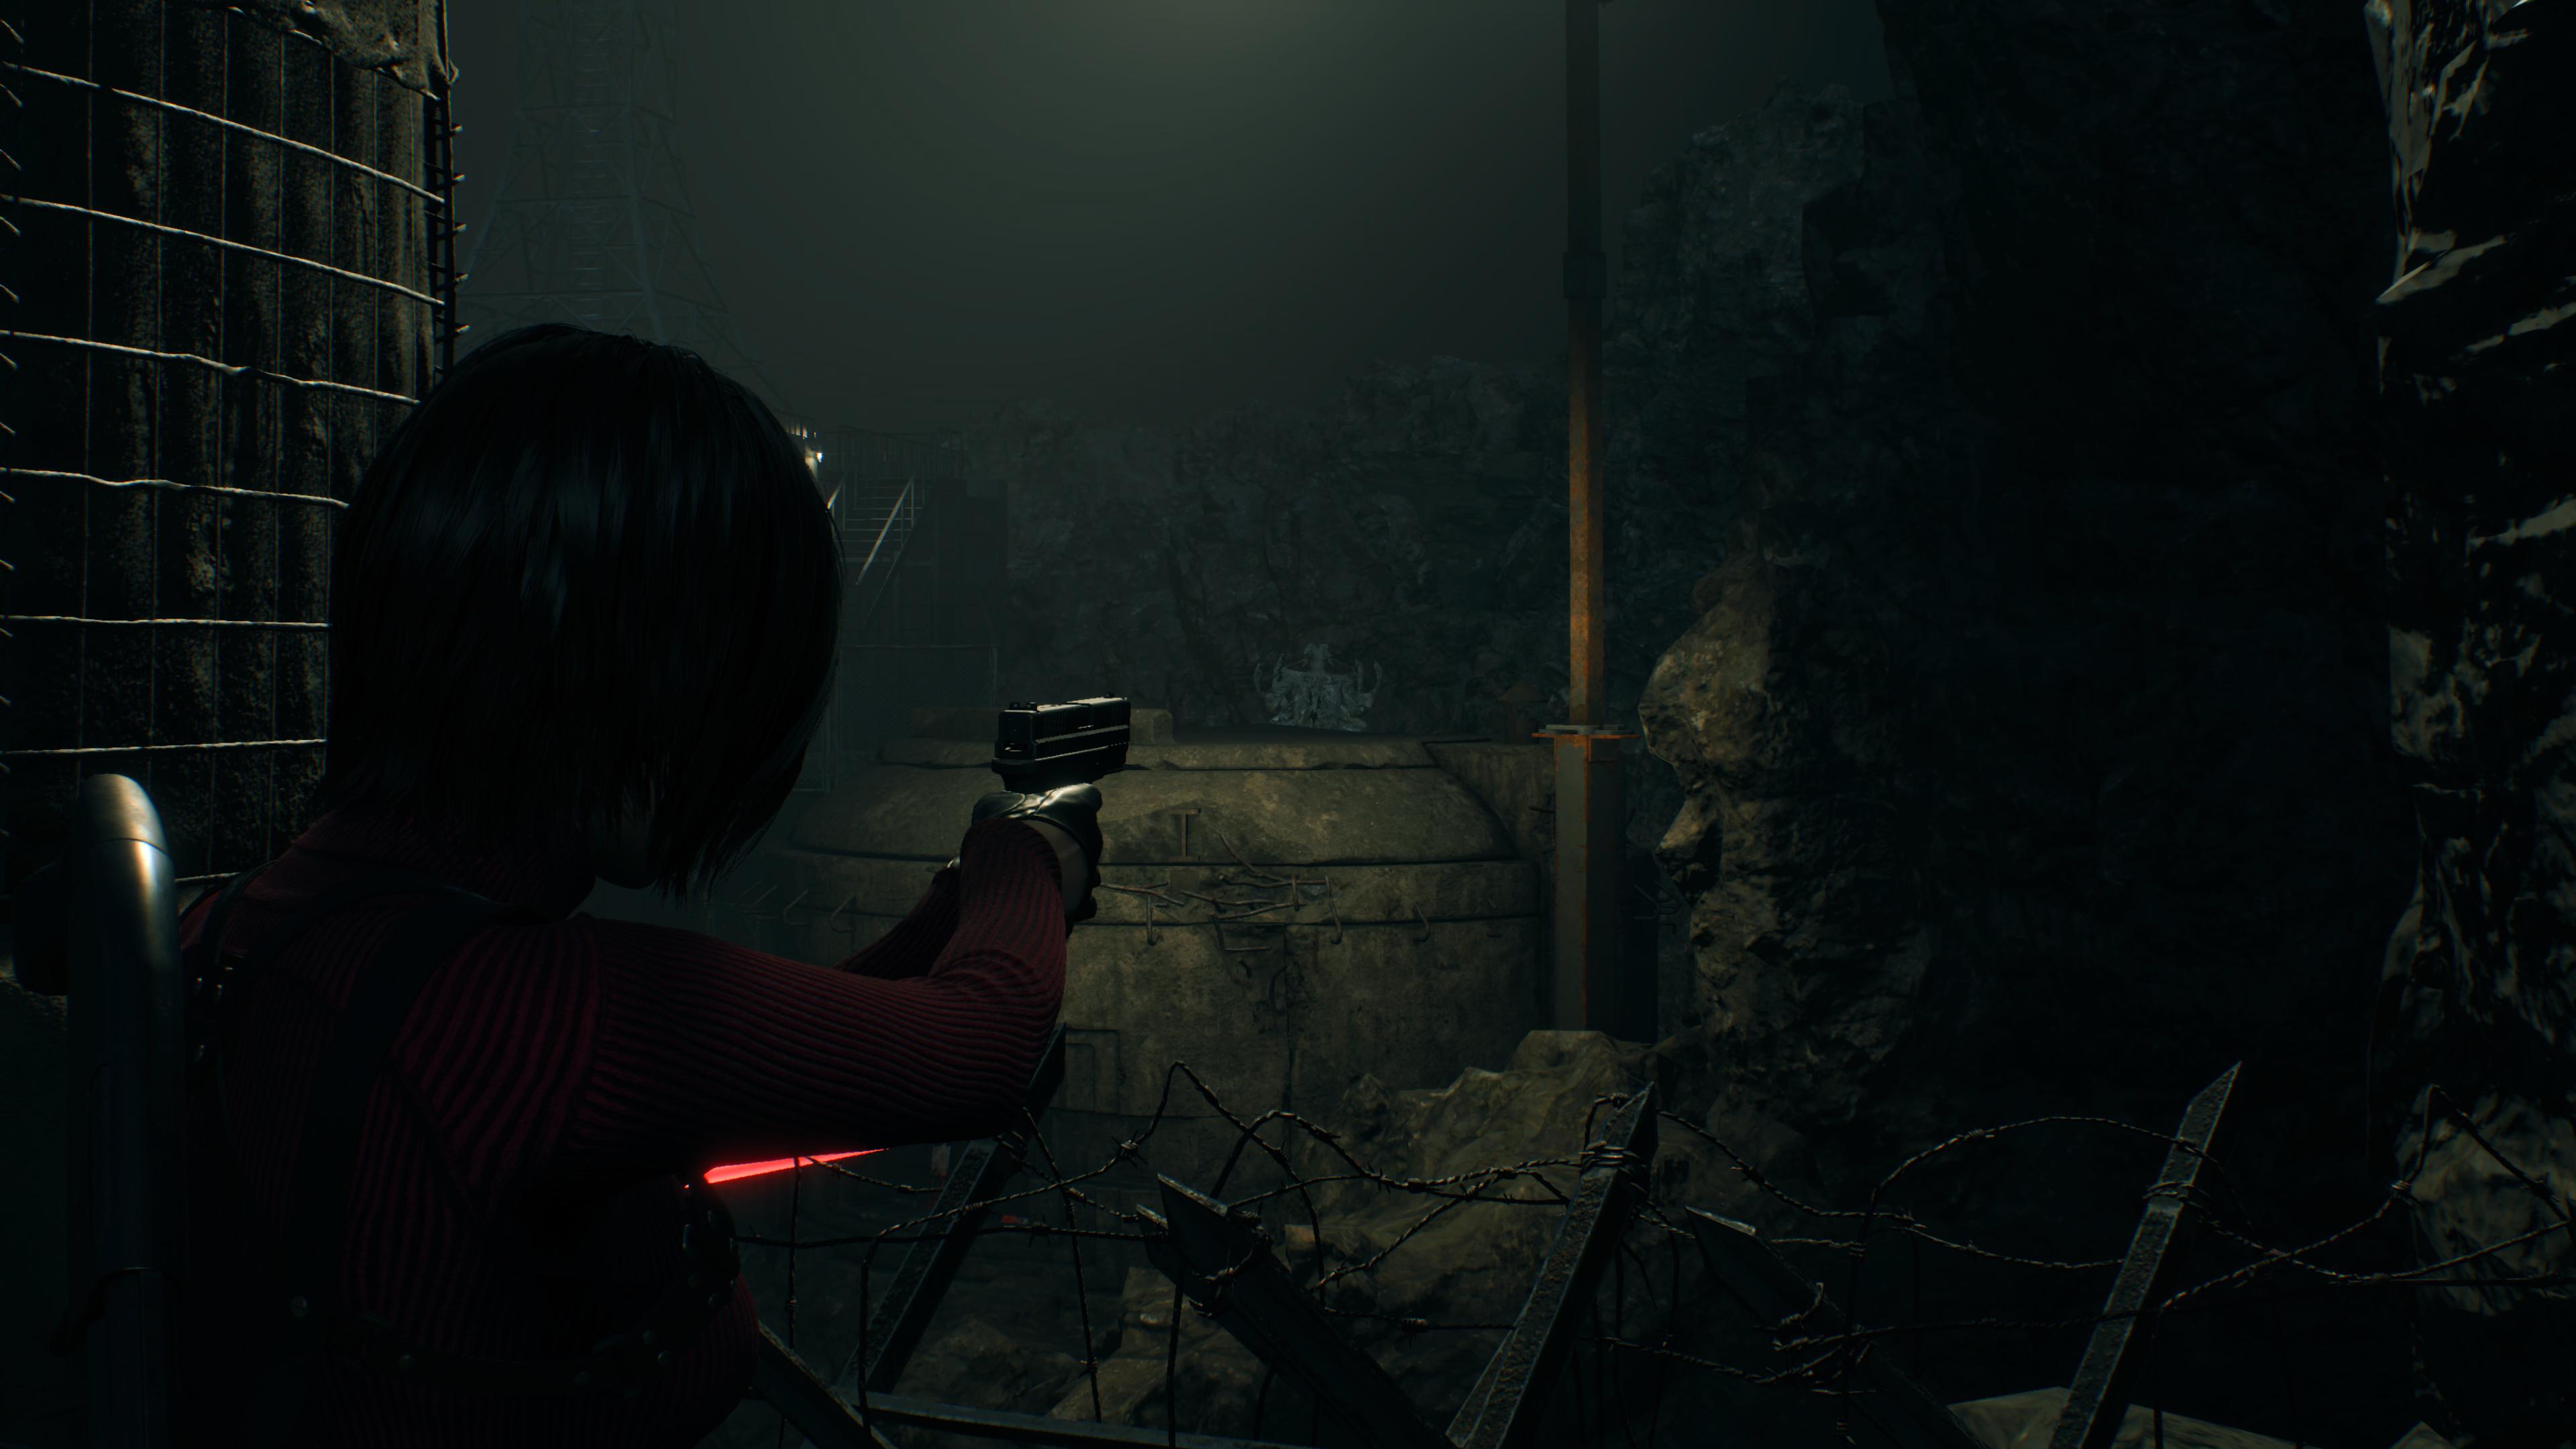
Bug No. 3
Just after the second bug, go up the nearby stairs and look out over the barbed wire to spot the third bug in the distance.
Editors’ Recommendations
Services Marketplace – Listings, Bookings & Reviews