When it comes to PC building, we’ve all made mistakes. I know I have. Even for those who know how to build a PC and have all their parts ready to go, there are a few potential traps that could trip you up if you’re not careful.
So, don’t make the same blunders I have — instead, apply these five tips to simplify the building process and make sure you avoid any snags along the way.
Get the right tools
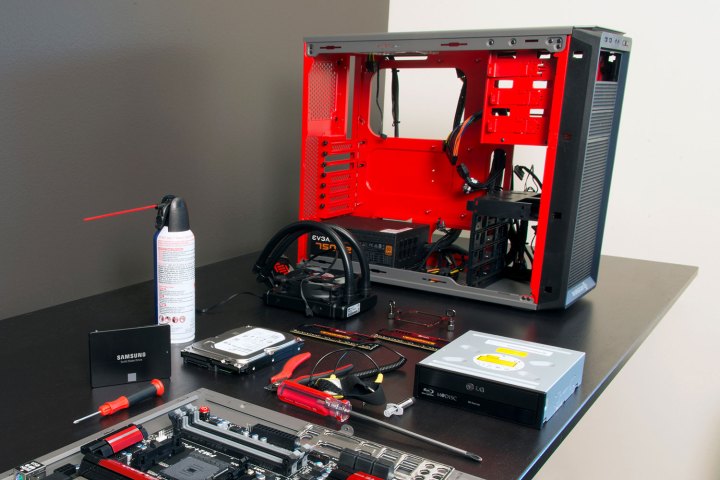
To build your PC, you’re going to need a little more than just that graphics card or processor that you just spent money on, but don’t worry — these tools aren’t going to add much more strain to your wallet.
First of all, a magnetic screwdriver can be a lifesaver in PC building. It’ll come in handy later on, too, when you periodically clean out the inside of your computer or install upgrades.
These special screwdrivers have magnetized tips, which means that they’ll attract and hold onto the screws during the installation process. They’re especially useful when you’re maneuvering around tight spaces because you won’t have to worry about dropping the screw.
One word of warning about magnetic screwdrivers is that you should avoid letting the tip touch any sensitive components, such as the motherboard’s circuitry. Technically nothing should happen, but it’s better to be safe than sorry, as some of the worst-case scenarios include data loss or damage to the components.
Aside from a magnetic screwdriver, make sure that you have a couple of Phillips head screwdrivers, as well as a flat-head screwdriver. Alternatively, get one with interchangeable bits. In any case, you’ll need lots of different bits, because you really don’t want to be forcing things or using the wrong size of screwdriver — there’s too much potential for damage.
Let’s wrap it up with a quick shopping list. Here are a few tools that you should have on hand when you build your desktop PC:
- Magnetic screwdriver
- A Phillips head screwdriver in varying sizes (or one with interchangeable bits)
- A flat-head screwdriver
- Cable ties
- A can of compressed air (in case of dust)
You could also keep a set of pliers and a wire cutter on hand, buttheyt most likely won’t be needed. Alternatively, buy a PC-building toolkit from a company like iFixit.
Avoid static at all costs
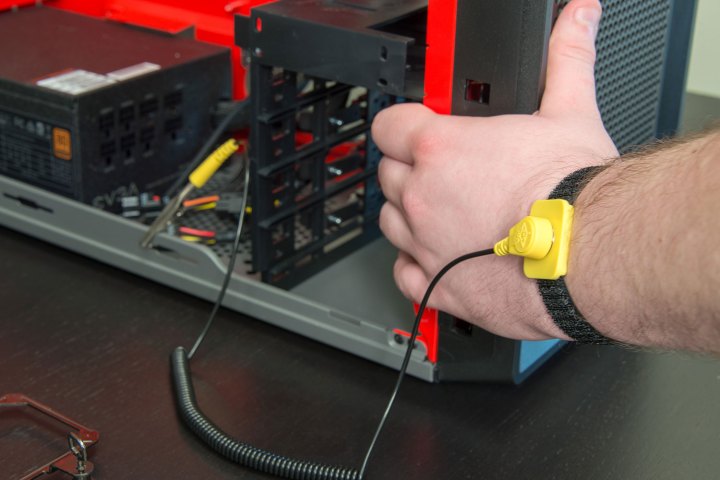
Electrostatic discharge (ESD) is a PC builder’s worst enemy– with the possible exception of the rising prices of various components. Some people will tell you that it’s not too bad, and that’s true — most of the time, it’s not. However, you don’t want to risk being in that small group of people who end up having problems with static, because it could potentially damage your whole computer.
Tackle this problem from a few different angles to be extra safe. First, you might want to invest in an antistatic wristband — they’re really cheap and they do the job, making you as free from static as possible. Just make sure that you ground it by attaching it to an earthbound object.
While a wrist strap is nice to have, you don’t actually need to buy anything in order to prevent issues. All you need to do is occasionally touch a metal surface that’s not connected to your PC. Even the side of your case works, as long as it’s the removable panel and you keep it away from the actual PC.
Your workspace is equally important. Pick a large area that lets you move around freely and set your PC down on a completely flat surface. The carpet is a big no-no, as is wearing socks and anything else that could possibly generate static. Avoid blankets, towels, and rags. If you need to wipe something up, use a paper towel instead.
Consider using a table or a desk for this — your back will thank you if you don’t build your PC on the floor, plus you’ll avoid dust and debris. If you want to set your case down on a table, don’t use a tablecloth. Instead, a large mouse mat or an antistatic mat will work better, but just the table itself will suffice.
Make sure that the unit is well-lit, and that includes both a solid top light and a flashlight. You can get a headlamp or just keep a regular flashlight on hand. Lastly, keep all the components packaged until it’s time to use them.
Don’t overuse the thermal paste
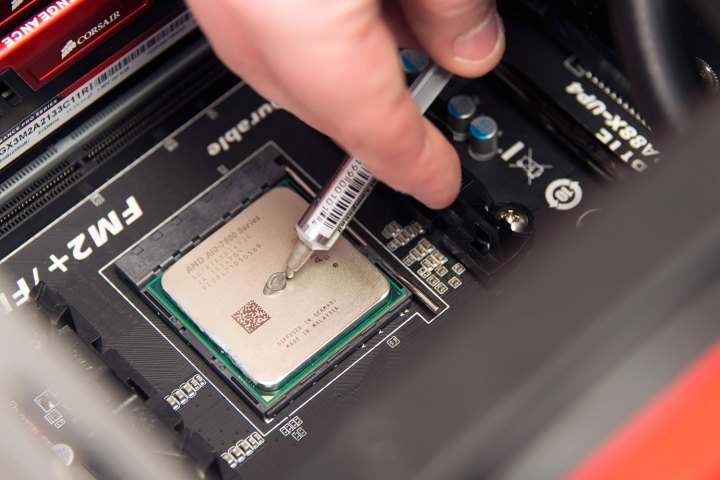
Your CPU loves thermal paste, but you need to be careful when applying it. Before we dive into that balancing act, let’s quickly talk about what thermal paste even is.
Thermal paste is essentially a silvery goo, but in more scientific terms, it’s a substance that improves the heat conduction between the surface of your processor and the CPU cooler.
You may not be able to see it, but both the CPU and the cooler are full of tiny microscopic air gaps that are detrimental to the cooling capabilities. Thermal paste fills those little gaps and ensures that the heat escapes your CPU as effectively as possible.
What would happen if you didn’t use thermal paste? It could be nothing, but it could also be something. A common scenario is that your PC would experience thermal throttling, which means that it would underperform due to the increased temperatures. In rare cases, your CPU might completely break down from overheating.
That doesn’t mean that you should apply half the tube all at once, though. Using too much could cause it to drip onto other components, such as the motherboard. That could wreak some serious havoc on your PC.
The rule of thumb for applying thermal paste is to stick to a pea-sized amount. Apply it directly in the center of the CPU. You may need to reapply it at some point in the future, but you’ll be safe for at least a few years (or until you remove your cooler).
To sum this point up: For efficient cooling and a safe PC, don’t forget to add thermal paste, but don’t overdo it. If you want to know more, we have a detailed guide on applying thermal paste, and we also have a list of the best thermal pastes available.
Read the manual
You might be rolling your eyes at this tip, but there’s a good reason for it. Many people don’t read the manual before building their PCs — and that’s a major oversight.
Watching video tutorials for building a computer is a great idea, but those one-size-fits-all videos won’t always apply to each and every component. Motherboards, especially, may have different layouts, and following a video without first consulting the manual could be disastrous (or, at the very least, a waste of your time).
Most, if not all, components will come with their own manuals. This includes a short installation guide with some visuals. After you’ve built a PC or two, you may no longer need guidance with things like RAM or an SSD, but you should always read the motherboard manual.
This quick read will show you exactly what to do, including the correct PCIe slot placement, CPU socket orientation, or RAM slots. It’ll also help you find your way around installing the motherboard itself. Ultimately, the manual for each component is the most reliable source of information — the internet may sometimes deceive you, but the manufacturers will know what you need.
However, don’t completely skip reading guides and watching videos even if your components aren’t mentioned by name. We have a step-by-step guide to building a PC if you want some reading material to refer back to, and watching a couple of videos will help you familiarize yourself with the entire process before you get started. Just make sure you don’t strictly follow the video and nothing else.
Don’t force it and keep it tidy
If you think a component is meant to go into a certain slot, it might be tempting to use a little force and push it in if it’s being stubborn … well, here’s a reminder that you should avoid doing that.
Some PC components look pretty sturdy. If you have a beefy graphics card, such as the RTX 4090, it’s a massive thing that takes up a lot of space. However, PC parts are also deceptively fragile, and applying too much force at the wrong time can cost you hundreds of dollars in damage. Keep in mind that this type of damage is most likely not covered by the warranty.
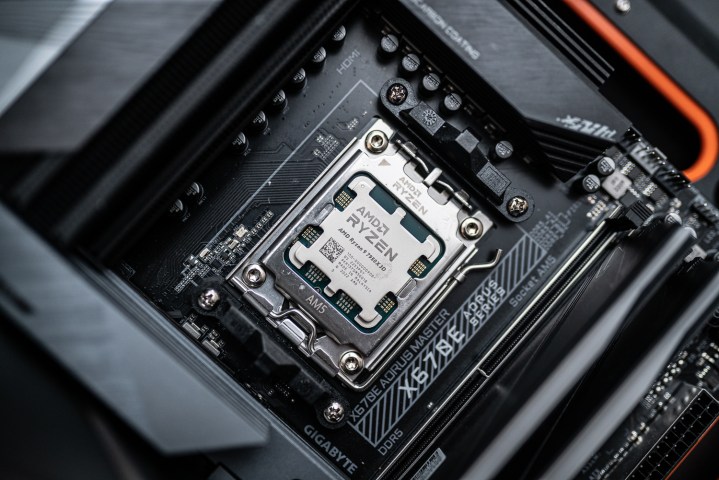
When installing components, the general rule of thumb is to be gentle, allow things to align, and if it doesn’t seem like it fits, there’s a chance that it isn’t supposed to. Take your time to examine both the component and the motherboard and make sure that everything is slotting into the right spot. When in doubt, refer to the manual or the video once again and compare your findings with the inside of your PC case.
Problems might start with the input/output (I/O) backplate, which can be famously frustrating to install. It has to sit flush against your case, and it will usually make a clicking sound when positioned correctly.
If you’re having some trouble with this, grab two diagonally opposite corners and fit them in nice and snug. The next step is to set up the remaining corners, and lastly, run your fingers across the perimeter to make sure you’ve got a tight fit.
The “wait for a click” rule applies to most components. If you don’t hear a click, it might not be mounted properly. In the case of the RTX 4090, that could end in a small fire inside your PC case, so make sure that you don’t stop until everything is secured in place.

Conversely, some components like RAM or PCIe cards may need a little pressure in order to be installed correctly. If you’ve installed new RAM and your PC is not recognizing it, you may have been too gentle.
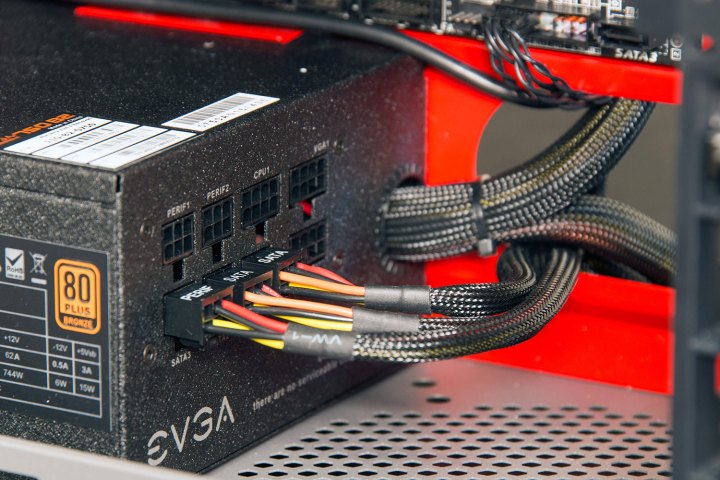
Lastly, let’s talk about cable management, which is why we advised you to buy some cable ties in the first tip. PC enthusiasts will often talk about it, and with good reason — keeping your cables nice and tidy has a lot of perks. Not only does it look nicer (which can be a huge perk if you’re using a cool-looking chassis) but it also promotes better airflow within your case. Your PC will thank you for it.
Finally, when you build your PC, don’t go rushing in. Prepare a plan of action that will help you manage the cables in an easy and clean way. Prioritize connections based on location and accessibility. It’s often easier to plug everything into the motherboard first and only then route the cables to their respective components. During the process, try to keep all your cables grouped and bundled.
Be careful, but have fun

PC building is supposed to be a semi-approachable task. If it wasn’t, all those components would not be sold to a non-technical audience — we’d all have to rely on prebuilt desktops instead.
If you’re looking for just one final bit of advice, it’s fairly simple. Be careful and take your time building your first PC, and then stay careful as you build your subsequent computers.
It’ll likely take a couple (or a few) hours, but at the end of it all, you can flip the switch on the PSU and proudly use a PC you built all by yourself. Enjoy the process and wait for that satisfying click — it’s worth the time.
Editors’ Recommendations
Services Marketplace – Listings, Bookings & Reviews