
Interacting with GitHub
We can use APIs to interact with GitHub too. Keeping it simple, we’ll use the POST request to create a new repo called api_test.
Authorization
First, as always, we need an authorization token. Fortunately, we can get this set up much faster than we did with the Google Maps API — you can find a step-by-step guide here.
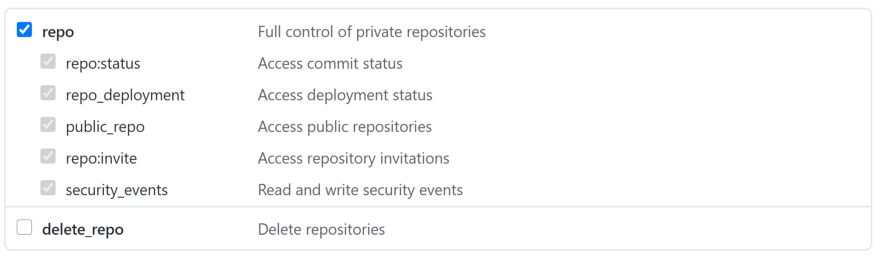
Note that on step seven, it is entirely up to you which permissions you select — but all we will need is repo:
Now, we can authenticate ourselves by adding headers={'Authorization': f'token {TOKEN}'} to our requests.
Create a repo
To create a repo, we simply send a POST request to https://api.github.com/ user/repos. The only required field here is the name value, which specifies the new repo name. We also set public to true which simply sets the repo privacy settings to public — rather than private (the default).
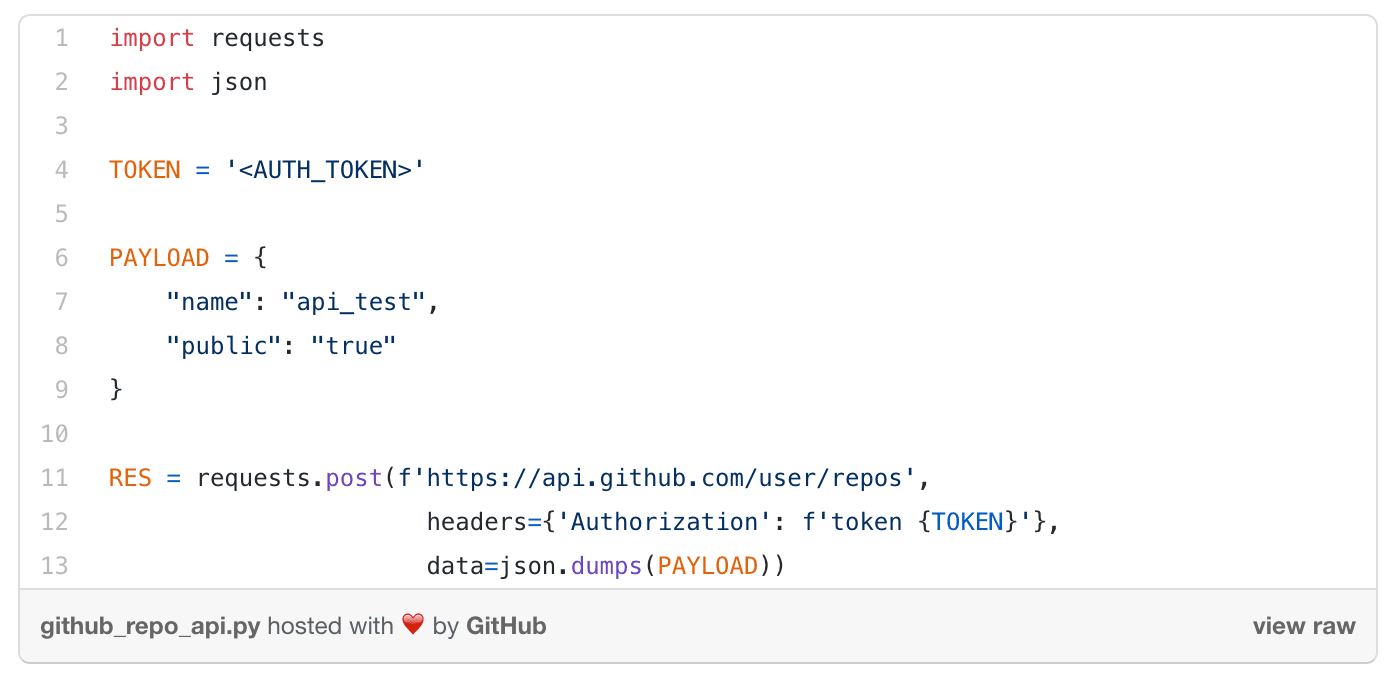
Note that we use PAYLOAD to contain our instructions for the API, which we pass to the data argument within requests.post. We also include our authorization key/token using the headers argument.
Results
If we succeed in creating the repo, we will receive code 201 Created — indicating that the request has succeeded, and we have created a new resource.

We can also check on GitHub, and sure enough the api_test repo is right there:

The GitHub API is very cool, there’s a lot we can do with it, and because of that, it’s great for learning — I would recommend taking a look at the docs if you’d like to learn more (feel free to ask me questions too!).