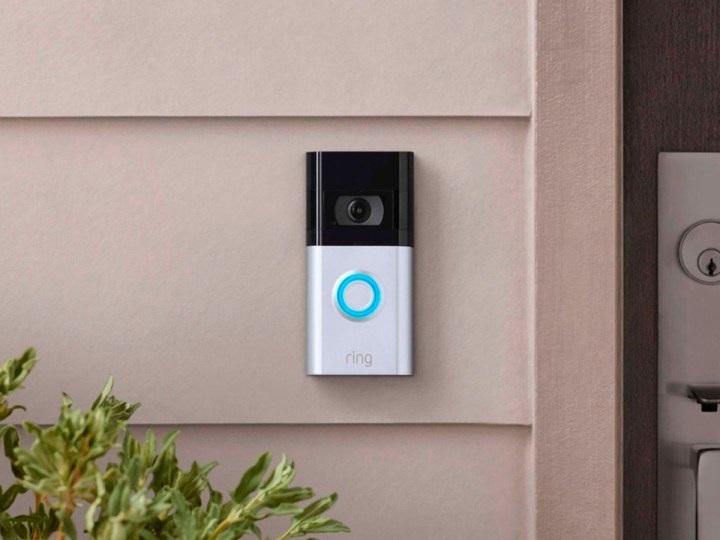

One of the main reasons Ring Video Doorbells are so popular is their simple installation process. Installing the wired models requires a bit of DIY know-how, but getting its battery-powered models up and running doesn’t require much more than a screwdriver and your smartphone. In fact, there’s a good chance you can have your Ring Video Doorbell out of its box and onto your porch in less than 30 minutes.
The installation steps vary from product to product, though most walk you through the process via the accompanying mobile app. But if you’re curious about the process, here’s a look at how to install a Ring Video Doorbell. This guide largely relates to the Ring Video Doorbell 2, though you’ll find that most products in the Ring catalog follow a similar procedure.
Prep
There are three things you need to get out of the way before installing your new doorbell.
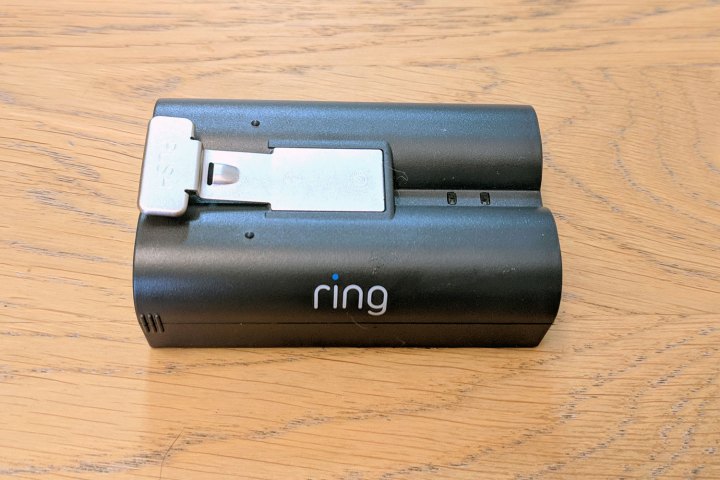
First, you need to charge the Ring Video Doorbell’s battery (if you’re installing a battery-powered model). Slip off the silver part of the case (the faceplate) and slide the battery out of the bottom of the doorbell. Then, plug the charging cable that it came with into the battery and plug it into a wall socket until only the green light is lit on the battery casing. When done, slip it back into the doorbell until you hear a click, but don’t put the faceplate back on the Ring just yet.
Second, turn off the power to your existing doorbell by flipping the corresponding switch in your home’s breaker box. If you don’t know which switch is the right one, flip the master switch. This will prevent an unwanted electrical shock while you’re installing your new doorbell.
Third, install the app and go through the onscreen instructions to connect your Ring Video Doorbell with your home’s Wi-Fi.
Remove the old doorbell
Next, you’ll want to remove your old doorbell. Use the screwdriver that came in the installation kit to remove the screws and pull the doorbell away from the wall. You should find two wires on the back of the doorbell wrapped around two screws. Loosen the screws and remove the wires from the doorbell.
Attach the Ring Video Doorbell
To install the Ring, you’ll need to grab a pencil, the screwdriver from the installation kit, and a drill if the installation holes don’t match up with the holes from your old doorbell (more than likely they won’t). Otherwise, you’ll just need the screwdriver.
If the holes don’t line up, hold the Ring doorbell against the wall where you’ll be installing it, and use the pencil to mark on the wall where the new screw holes will need to be. Then, use your drill to make the new holes. Put the plastic hole anchors that came with the doorbell into the drilled holes.
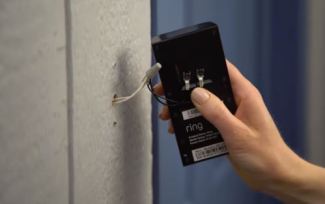
Next, loosen the screws on the back of the Ring. Wrap the doorbell wires around the screws on the back of the Ring doorbell and tighten the screws.
If the wires are too short, grab the wire extensions from the installation kit. Slide the bottom of a wire extension and a wire coming out of your wall into a wire nut from the kit (they look like gray caps) and twist the wire nut clockwise to join the two wires. Then, just slide the wire extenders under the screws and tighten them.
If your old doorbell was digital, you’ll need to install the diode that came with the installation kit. The diode looks like a wire with a black bead in the middle. To install the diode, take the screws out of the doorbell, slide the screws through the holes in the wire, and then screw the screws back into their holes before wrapping the wires around them.
Tip: If your Ring doorbell doesn’t work after installation, take the diode off, flip it around and reinstall it. Take a look at the video, below, for more information on installing the diode.
Secure the doorbell to the wall using the screws it came with. Your Ring will need to be four feet off the ground to work properly. If you’re installing it higher than that, put the installation wedge that came with the doorbell behind the upper part of the unit before you screw it to the wall. This will make the doorbell slant downward just a bit so it has the perfect view of your walkway.
Finishing up

Remember the faceplate you removed to charge the battery? Now you can snap that back into place. Use the star-shaped end of the screwdriver to put the tiny screw from the installation kit in the hole at the very bottom of the doorbell. This will prevent the faceplate from coming off.
Finally, turn the power back on. The ring on the front of your doorbell should be lighting up and you should be able to use the app to see what your new doorbell sees.
What about other Ring Doorbells?
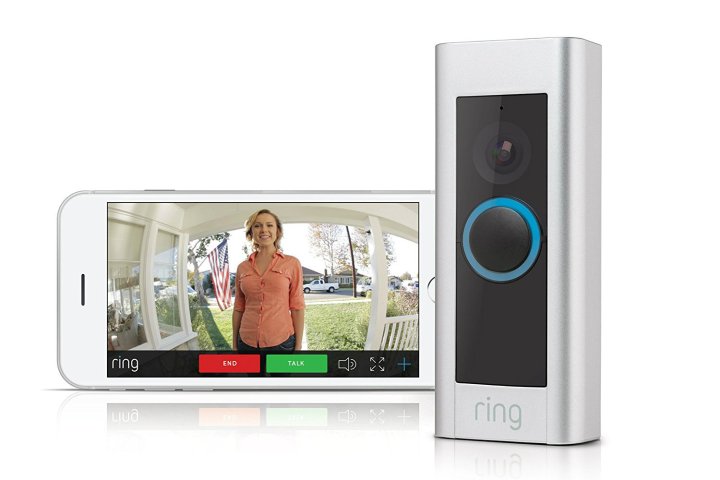 Image used with permission by copyright holder
What if you have a different Ring Doorbell model? The good news is that if your Ring Doorbell can be installed with a wired connection, the steps are all basically the same, and the design should be similar, too. Let’s briefly break down the key differences between models.
Ring Battery Doorbell Pro: This model launched in 2024 and is battery-powered. However, it also supports wired installation.
Ring Video Doorbell (2nd Gen): Released in 2020, this new doorbell has an integrated battery, which means that in order to recharge it, you’re required to remove the entire doorbell from the faceplate.
Ring Video Doorbell 2: The flagship model can be hardwired, but has a rechargeable battery you can use instead. You don’t have to wire it in at all if you don’t want to, but that means it won’t physically ring your bell, either.
Ring Video Doorbell 3: This model can be wired in but also has a “quick release” battery. In practice, it works the same as the Ring Video Doorbell 2 model.
Ring Video Doorbell Elite: The Elite is an interesting exception, as it can only be attached to Power Over Ethernet connections, a type of internet connection that also supplies power. If you accidentally are stuck with an Elite model and have no PoE options, there’s an adapter you can get.
Ring Video Doorbell Pro: This model can only be wired into your existing door. There is no battery option.
Ring Peephole Cam: This model only has a battery; there is no option to wire it in.
Ring Video Doorbell 3 Plus: The design here is largely the same as the Doorbell 3, so it can be wired in, or it can use a battery.
Editors’ Recommendations
Services Marketplace – Listings, Bookings & Reviews